Pellet Grilling

arrow

Why use a pellet grill?

Jan Spielhagen: Pellet grilling has some of the advantages offered by both gas and charcoal barbecues. With gas, it’s possible to change the temperature quickly and accurately, and to get a lot of heat. With charcoal, you can do a technique called smoking, where you put wood chips into the grill and the smoke flavours the food. A pellet grill can do both of these.

What are pellets?

JS: Pellets are produced using pressed-wood sawdust from only one type of wood, like hickory, apple or apricot. A pellet grill feels natural; it has the feeling of making a real fire and the smell of burning wood.

What are its challenges?

JS: Pellet grilling always had one concern: the pellet feeder. You put pellets into the pellet holder on one side, they move through the feeder and fall down into a chamber to be burned. But the flame needs to stay away from the pellet feeder, otherwise “burn back” can happen, where the pellets inside the feeder ignite and cause errors, or even make the grill catch fire. Plus, if you don’t use it for a few days and the pellets stay inside the feeder, they can get moist and hard, which means they are likely to cause errors the next time you use it. Those were always the sticking points of pellet grills, but the new Weber grill has unique engineering that ensures the pellets are always exactly where you want them to be.

What meat do you think works particularly well on a pellet grill?

 JS: Pork ribs are the best if you have continuous heat and smoke. And you can do that in the pellet grill much more simply than with gas. It’s not as straightforward as a proper smoker, but those are 500 kilos and look like locomotives! Although it does require electricity to run the motor, a pellet grill is a very good alternative for something like pork ribs. It can also cook other things like fish and vegetables just as well as in a gas barbecue, because of the possibility to change temperature quite quickly, and have different heat zones.  

A Pallet Grill Feels Natural

Flavour Above All

Weber® SmokeFire

Ingredients

  • circleServes: 4–6
  • circle3 - 4 h
  • Rub
  • 2 tbsp salt
  • 2 tbsp paprika
  • 4 tsp granulated garlic
  • 4 tsp pure ground ancho chilli
  • 2 tsp freshly ground black pepper
  • 1 tsp ground cumin
  • Barbecue Sauce
  • 180ml unsweetened apple juice
  • 120ml ketchup
  • 3 tbsp cider vinegar
  • 2 tsp soy sauce
  • 1 tsp Worcestershire sauce
  • 1 tsp molasses (not blackstrap molasses)
  • 1⁄2 tsp granulated garlic
  • 1⁄2 tsp pure ground ancho chilli
  • 1⁄4 tsp freshly ground black pepper
  • Mop
  • 240ml unsweetened apple juice
  • 3 tbsp cider vinegar
  • 2 tbsp unsalted butter
  • 2 tbsp barbecue sauce (from above)
  •  
  • Special Equipment
  • Silicone basting brush

Instructions

  • 1. In a small bowl mix the rub ingredients together. Set aside when finished.

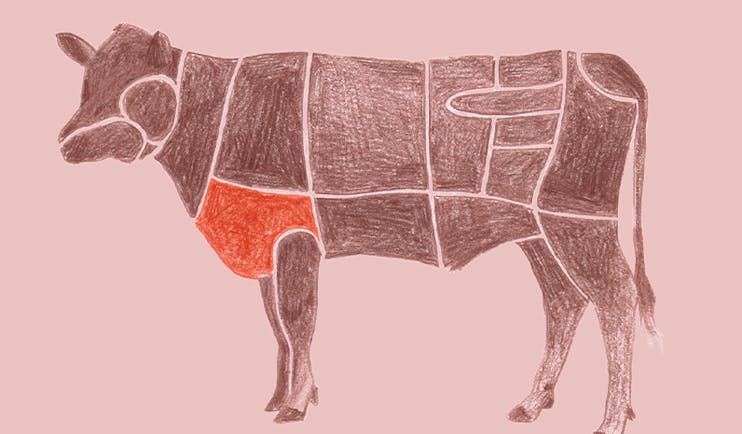
  • 2. Using a dull knife, slide the tip under the membrane covering the back of each rack of ribs. Lift and loosen the membrane until it breaks, then grab a corner of it with a paper towel and pull it off. Cut each rack crosswise in the middle to create two smaller racks. Sea- son the racks all over, putting more of the rub on the meaty sides than the bone sides. Leave the racks to stand at room temperature for about 30 minutes.

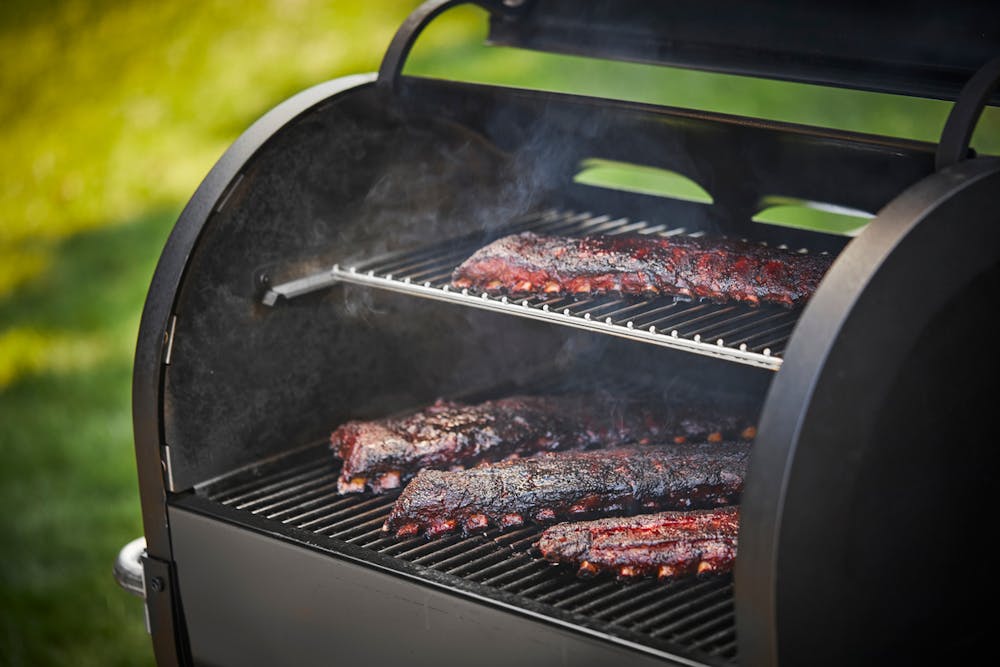
  • 3. Set your barbecue up for cooking over low heat (120°C).

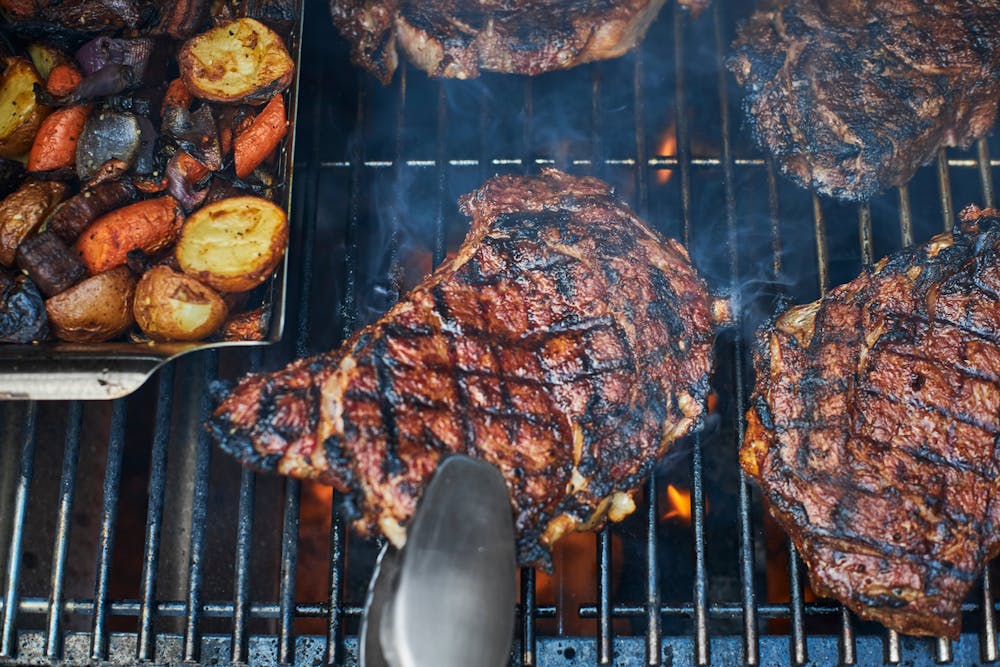
  • 4. Place the ribs, bone-side down, on the cook- ing grate, close the lid and cook for 1 hour. Meanwhile, make the sauce and the mop.

  • 5. In a small saucepan mix the barbecue sauce ingredients. Bring to the boil over medium heat on the stove, stirring often. Reduce the heat to medium-low and simmer for around 3 minutes to blend the flavours. Remove from the heat.

  • 6. In another small saucepan mix the mop ingredients. Bring to the boil over medium heat on the stove, stirring often. Reduce the heat to medium-low and simmer for about 3 minutes to blend the flavours. Remove from the heat.

  • 7. After the first hour, lightly baste the ribs with some of the mop. Close the lid and cook for another hour.

  • 8. After the second hour, generously baste the ribs with some of the mop. Close the lid and cook for another hour.

  • 9. After 3 hours of cooking, check if any of the racks are ready to come off the barbecue. They are done when the meat has shrunk back from most of the bones by about 1⁄2 an inch. When you lift a rack by picking up one end with tongs, bone side up, the rack should bend in the middle and the meat should tear easily. If the meat does not tear easily, continue to cook the racks. The total cooking time could be anywhere between 3 to 4 hours.

  • 10. Lightly brush the cooked racks with some sauce. Transfer to a tray and tightly cover with aluminium foil.

  • 11. Let the ribs rest for 10 to 15 minutes before serving.

  • 12. Cut the racks between the bones into individual ribs and serve warm with the remaining sauce on the side.

  • All of our recipes are created by our expert chefs at the Weber Grill Academy. View more inspirational recipes or book a course at the Grill Academy now.

    Grill Academy Logo
Weber Teaser Hero Medium 796X520

KNOW YOUR CUTS - ESSENTIAL TO TASTY RESULTS

LEARN MORE
Weber Teaser Adam Johnson 796X520

SEASONAL VEGETABLES - SPRING

LEARN MORE
Weber Teaser Smokefire Hero 796X520

LEARN MORE ABOUT PELLET GRILLING

LEARN MORE