Buy now, pay later. Rates as low as 0% APR financing with Affirm. Apply Now.
How To Spatchcock A Turkey
One of the big thrills of grilling a whole turkey is the presentation. Placing a plump, golden brown bird in the middle of the dinner table is one of the most picturesque and memorable settings of the holiday season. At least it is if you carve the bird at the table. I don’t. I make a mess in the kitchen.
While there is no denying how wonderful a perfectly grilled turkey looks, my guests rarely see it unless they happen to intercept me on my trip in the backdoor from the grill. Instead, they are treated to a beautiful platter of sliced breast meat, pulled thighs, and criss crossed turkey legs. Once the food goes down, it’s time to eat, not stare.
So yes, a whole turkey looks awesome. However, what if we had a way to grill turkey in half the time that tastes twice as good and doesn’t require a photo opportunity? We do. We can spatchcock it.
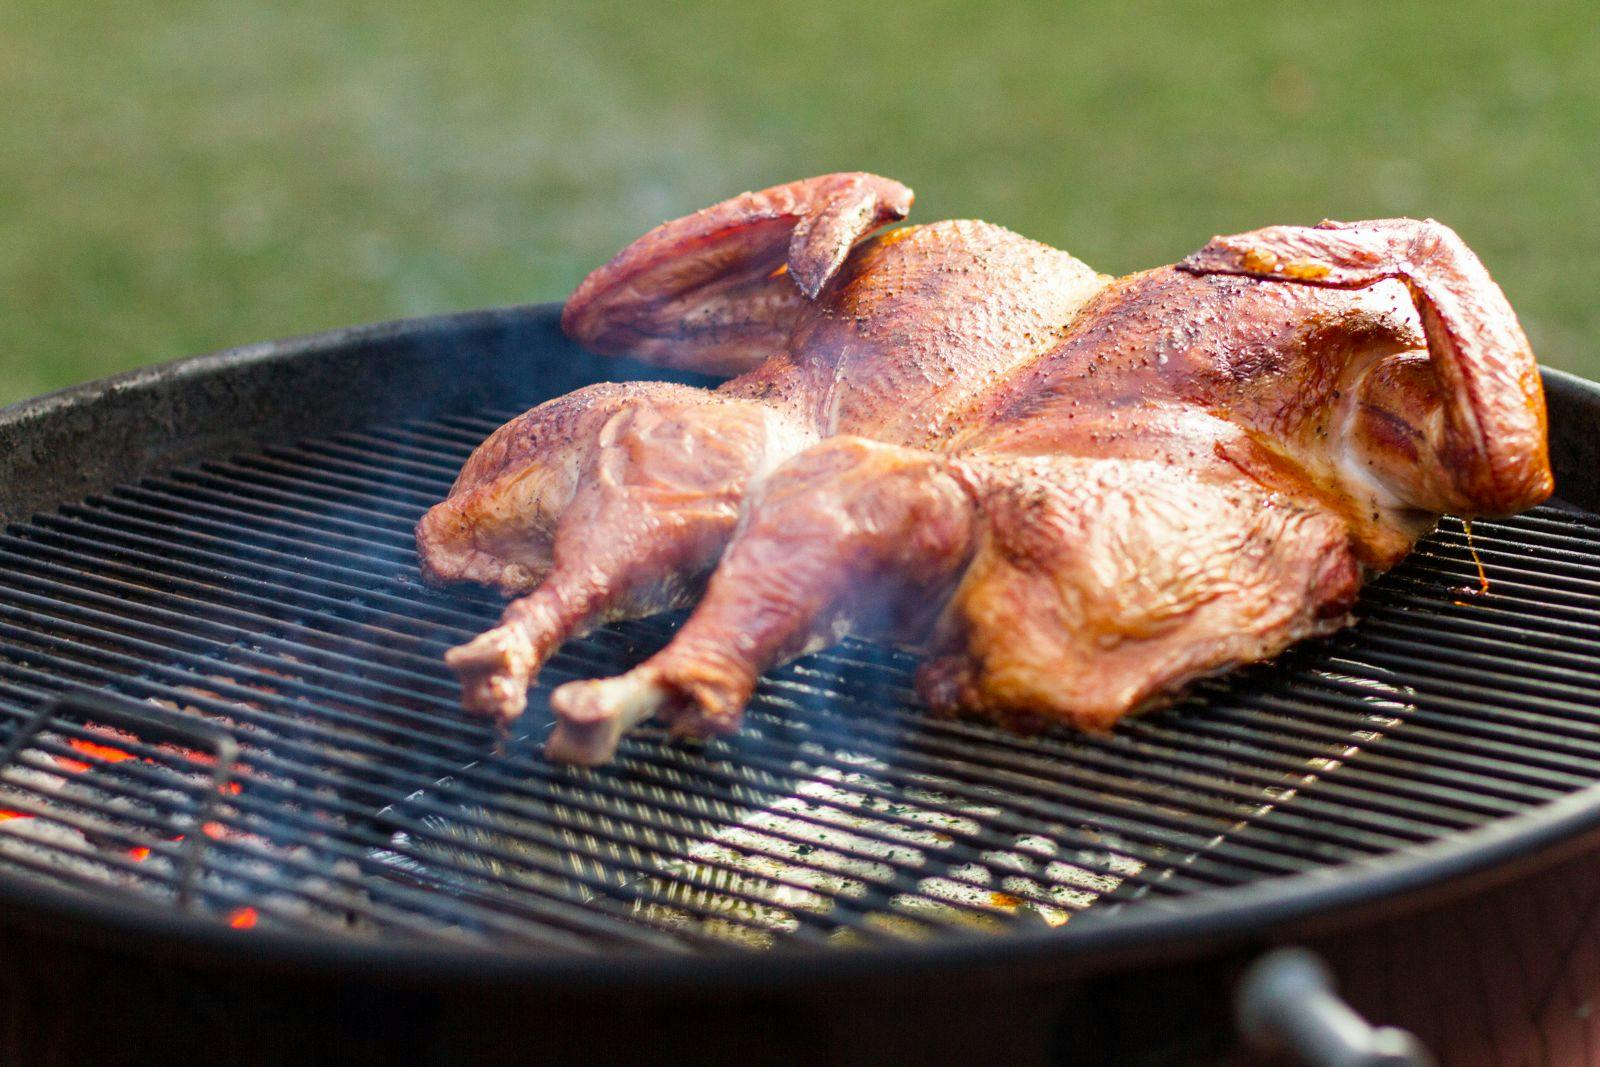
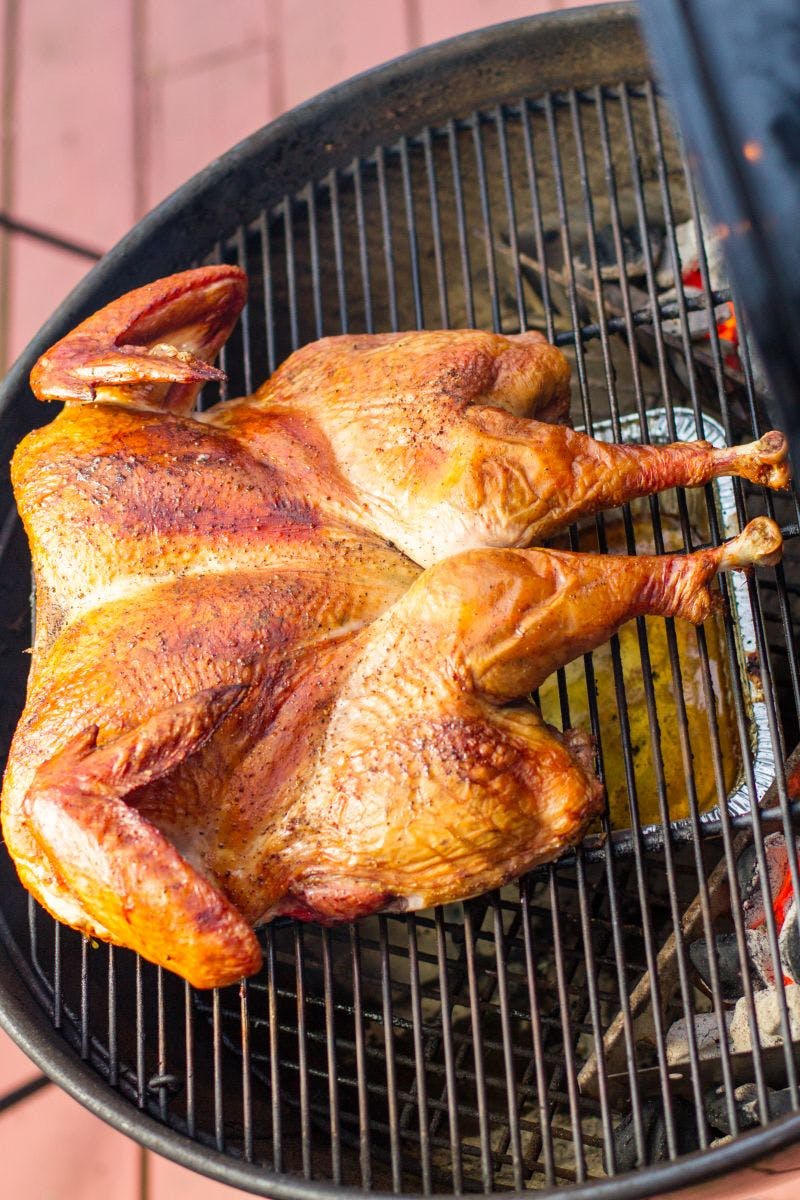
I’m a huge fan of spatchocked chickens, which is the process of removing the back bone, cracking the breast bone, and grilling the entire bird flat. It’s a faster, more even cook, which yields wonderfully moist meat and crisp skin. It works great for a chicken and it definitely works great for a turkey, too.
Spatchcock Turkey
by Mike Lang
Serves: 8-10 people
Ingredients:
1 fresh or thawed turkey, 10-14 pounds
½ cup unsalted butter, room temperature
2 T Herbes de Provence
olive oil
salt and pepper
While a spatchcock chicken can fit on any grill, a spatchcock turkey takes up a little more real estate. My 14 pound turkey easily fits on my 26.75” One Touch Gold, or if I was using a gas grill, my Summit Grill Center. For a 22” kettle, I would use a turkey closer to 10 pounds.
The Spatchcock
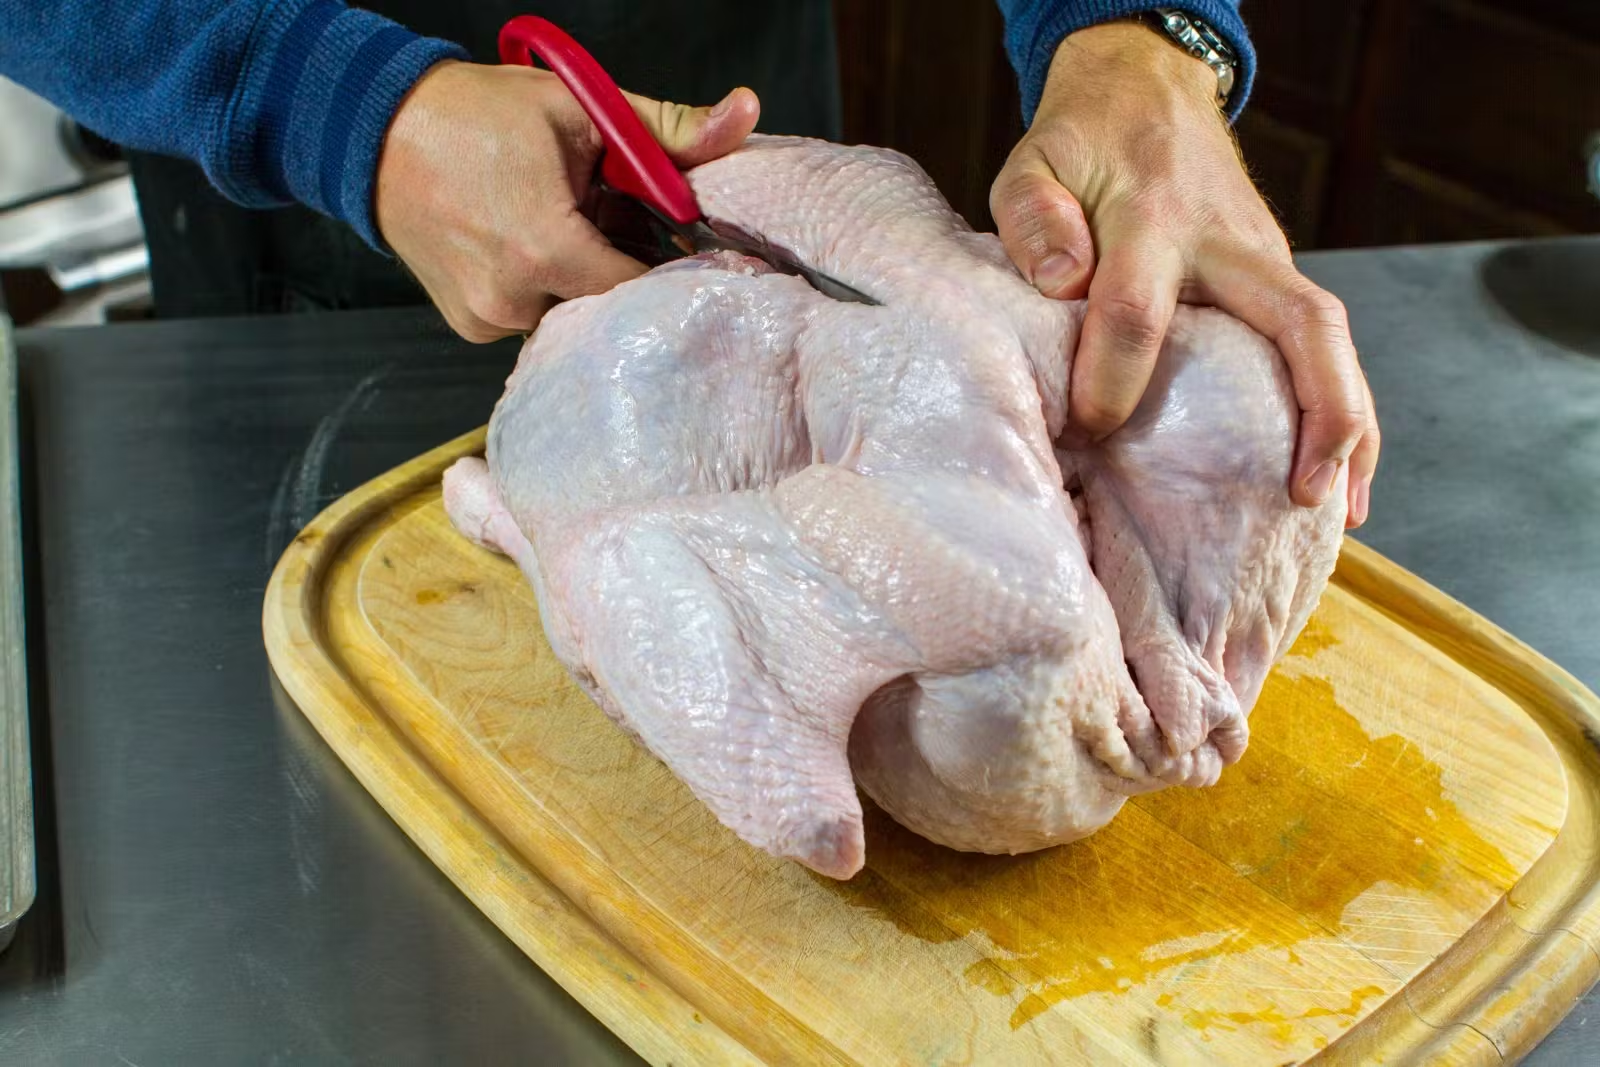
Tools: Kitchen Shears
Place the turkey breast side down. With a sturdy pair of kitchen shears, start to just one side of the turkey’s tail and cut up one side of the turkey’s backbone.
Next, cut up the other side of the backbone.
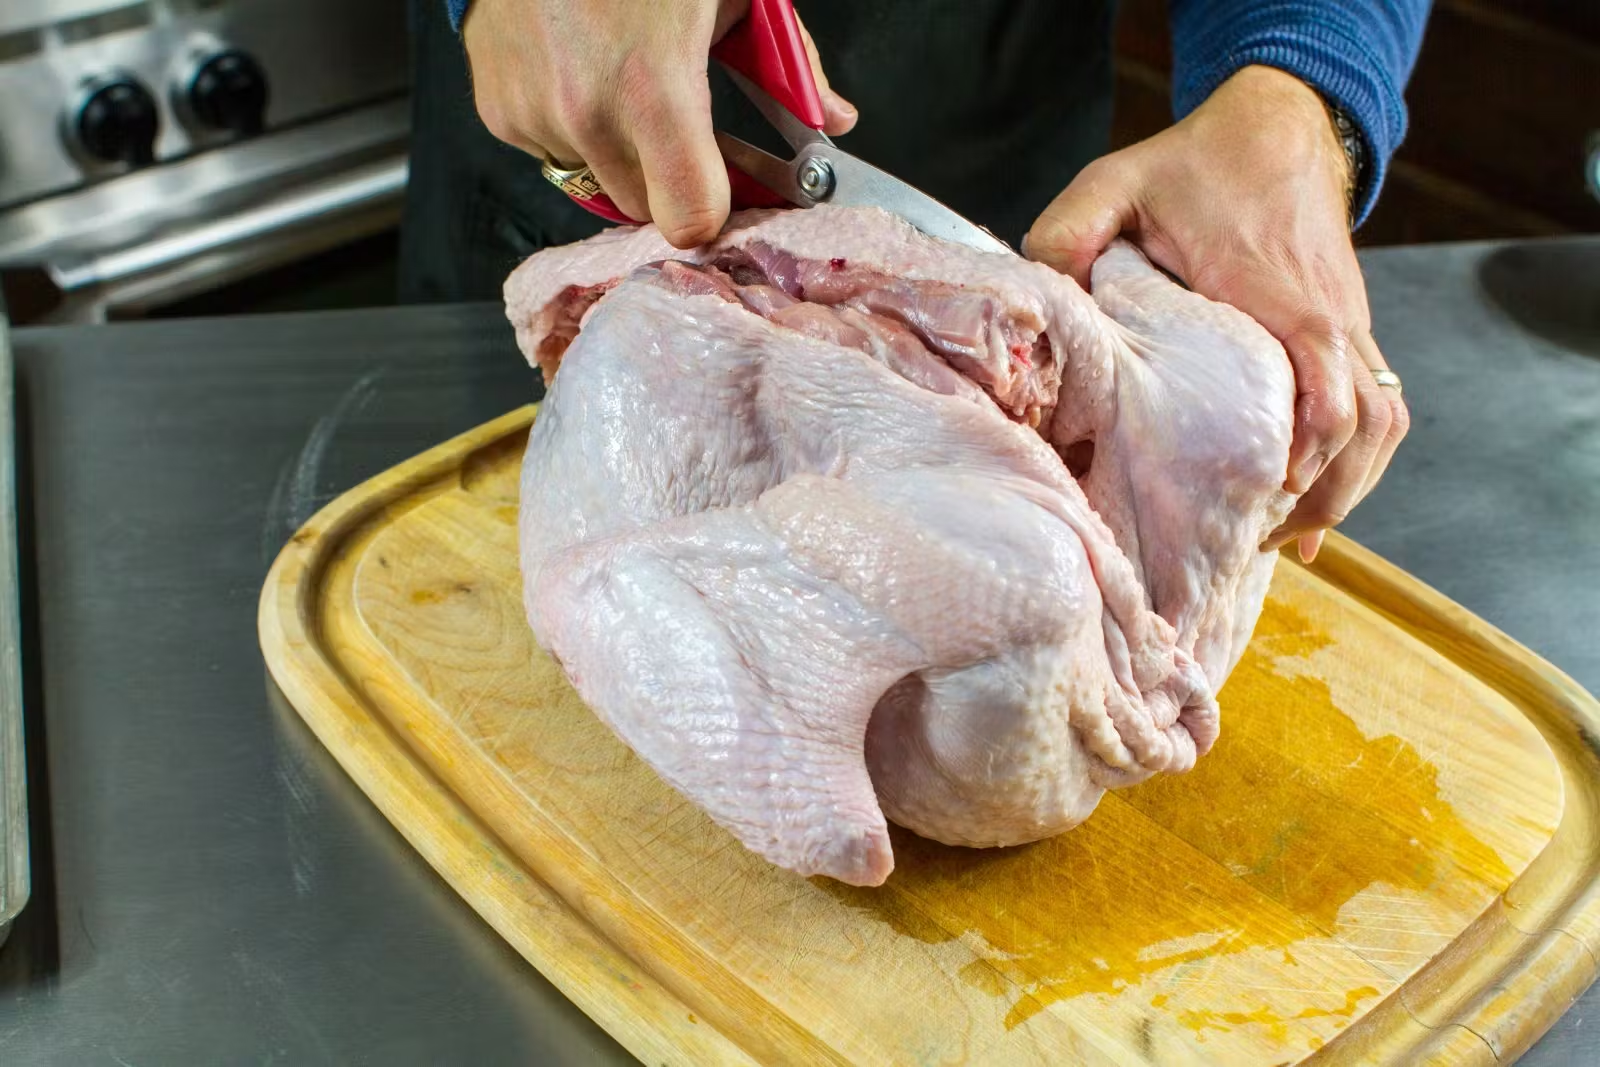
Remove the backbone and either discard or save for another use.
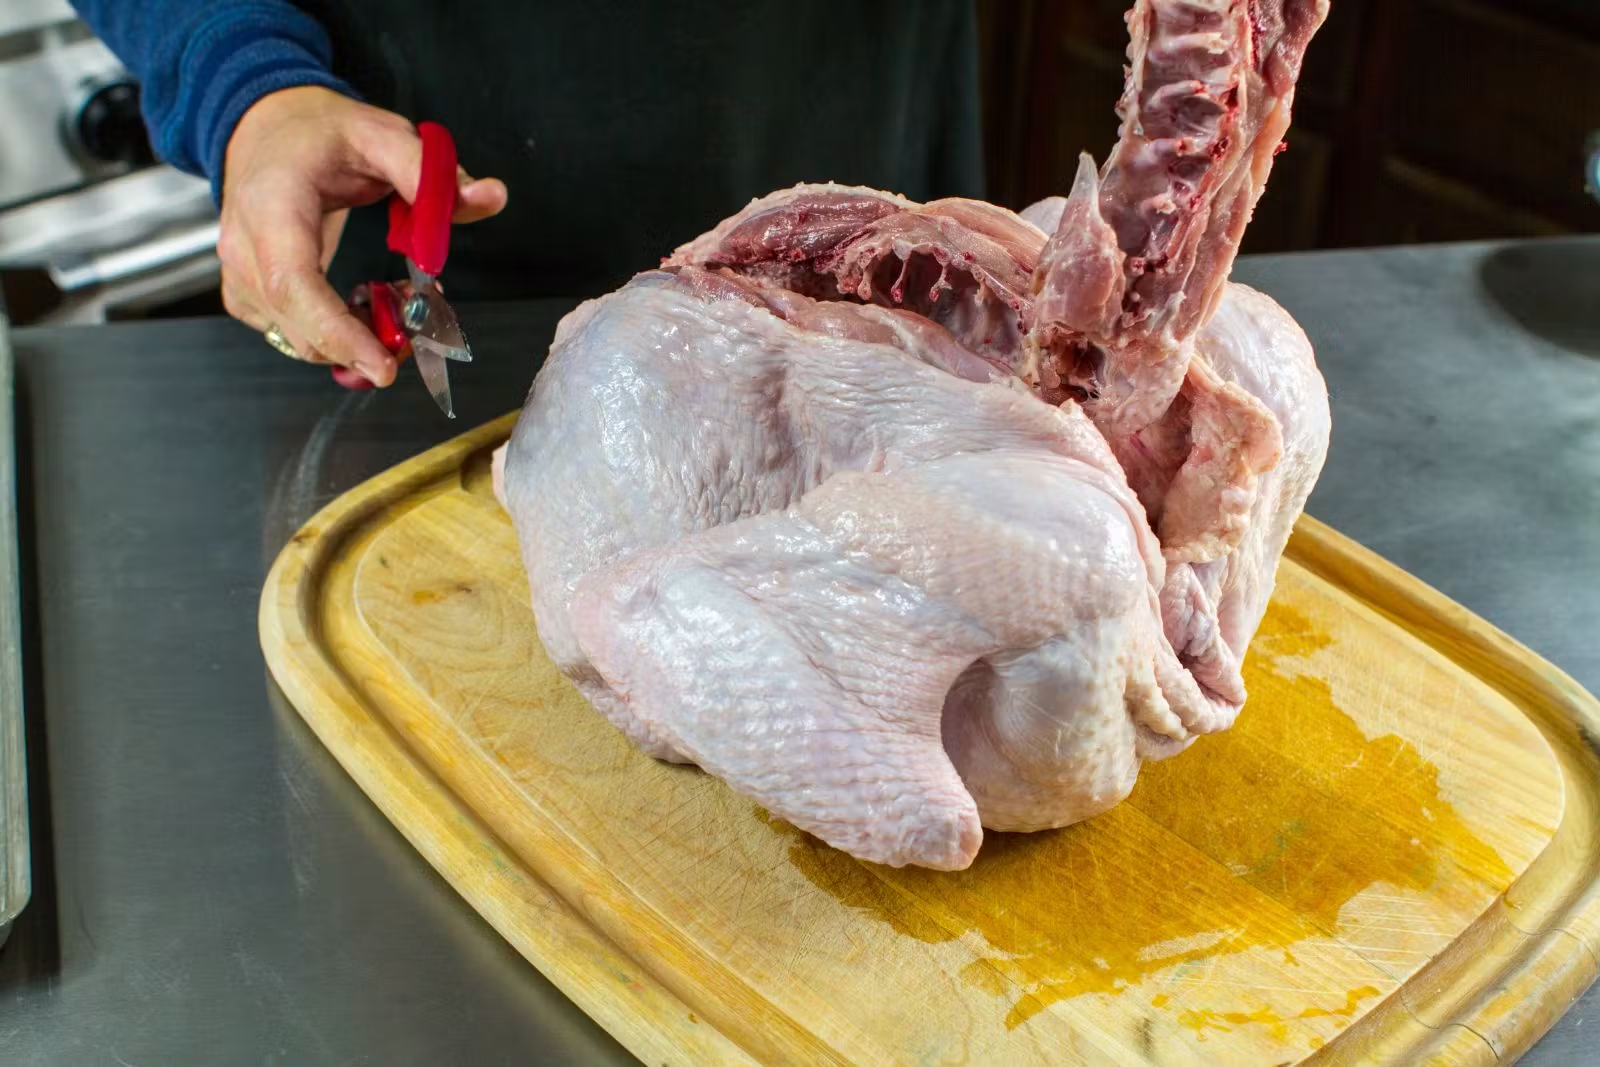
Locate the breast bone and snip an inch or so in with the shears.
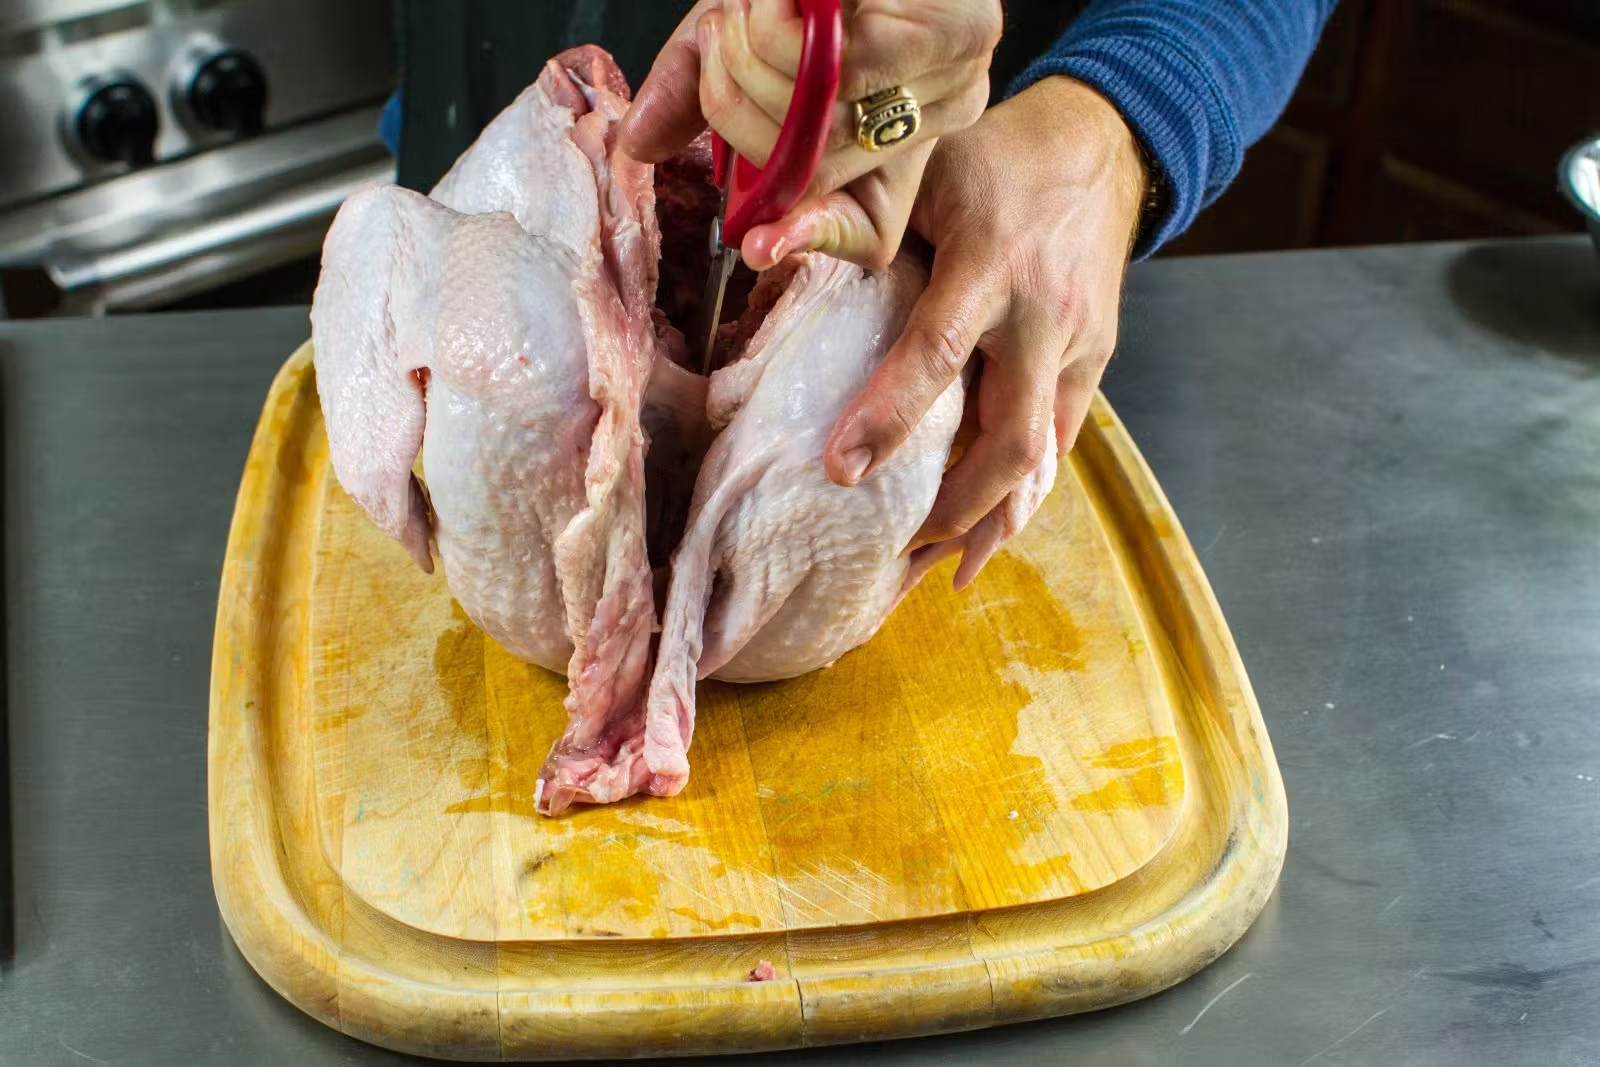
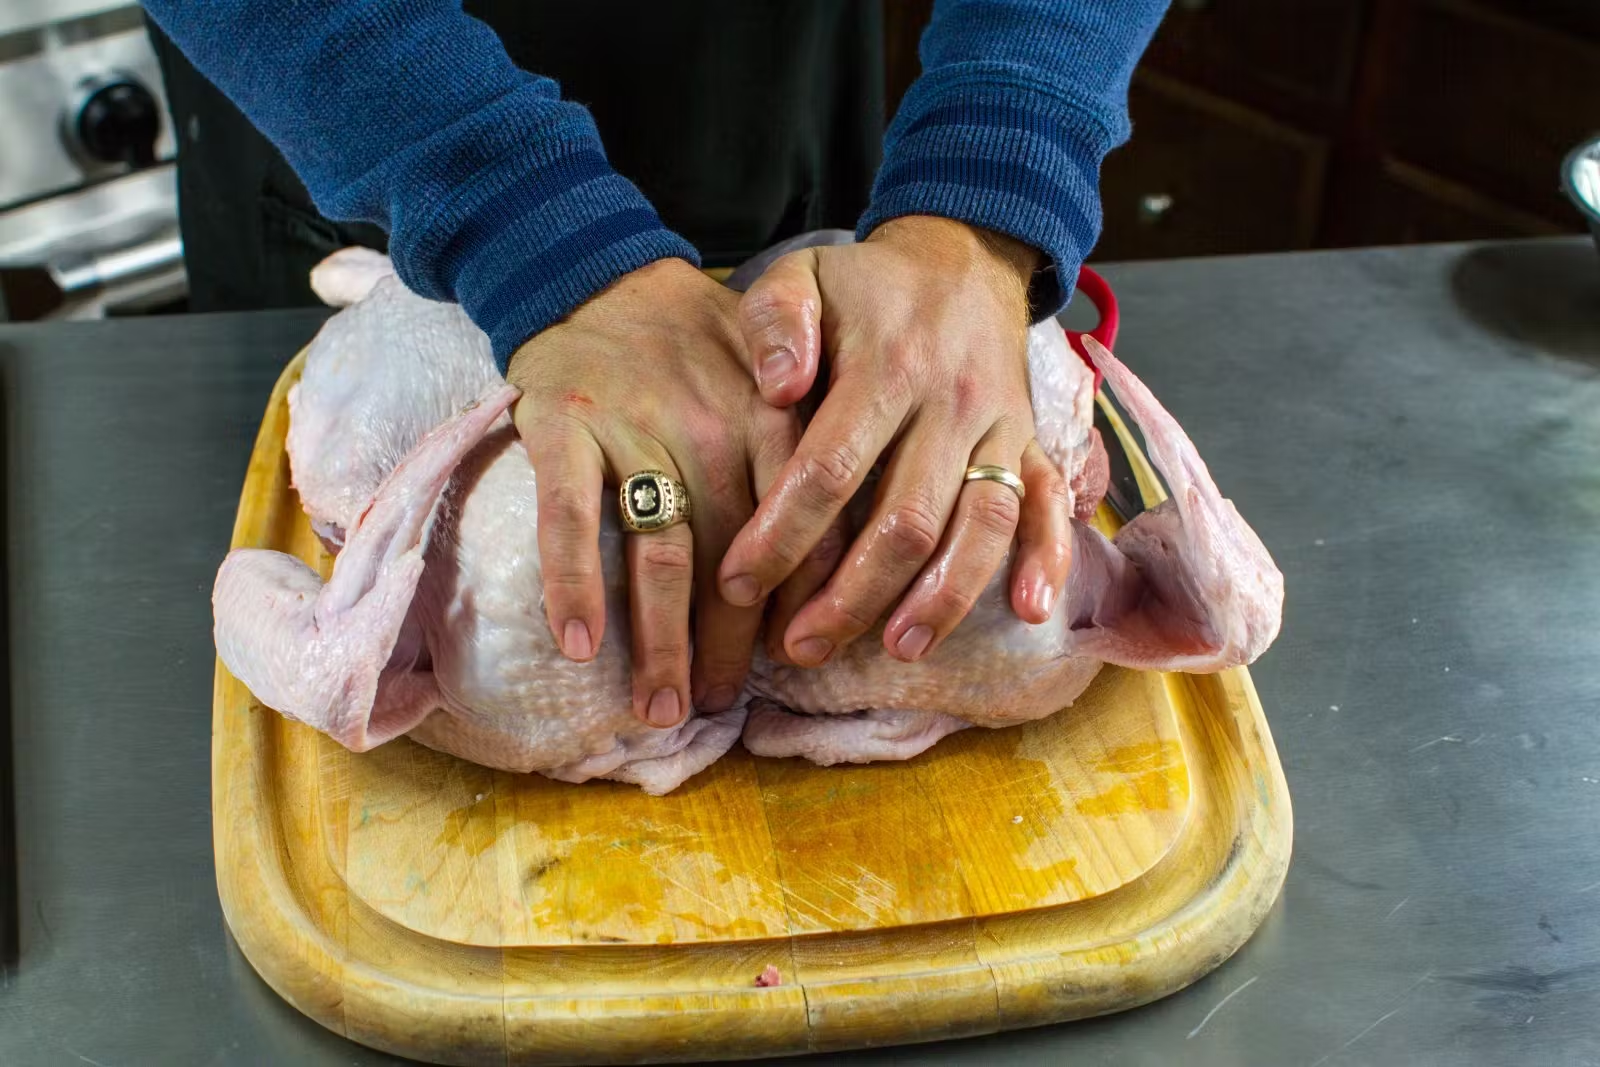
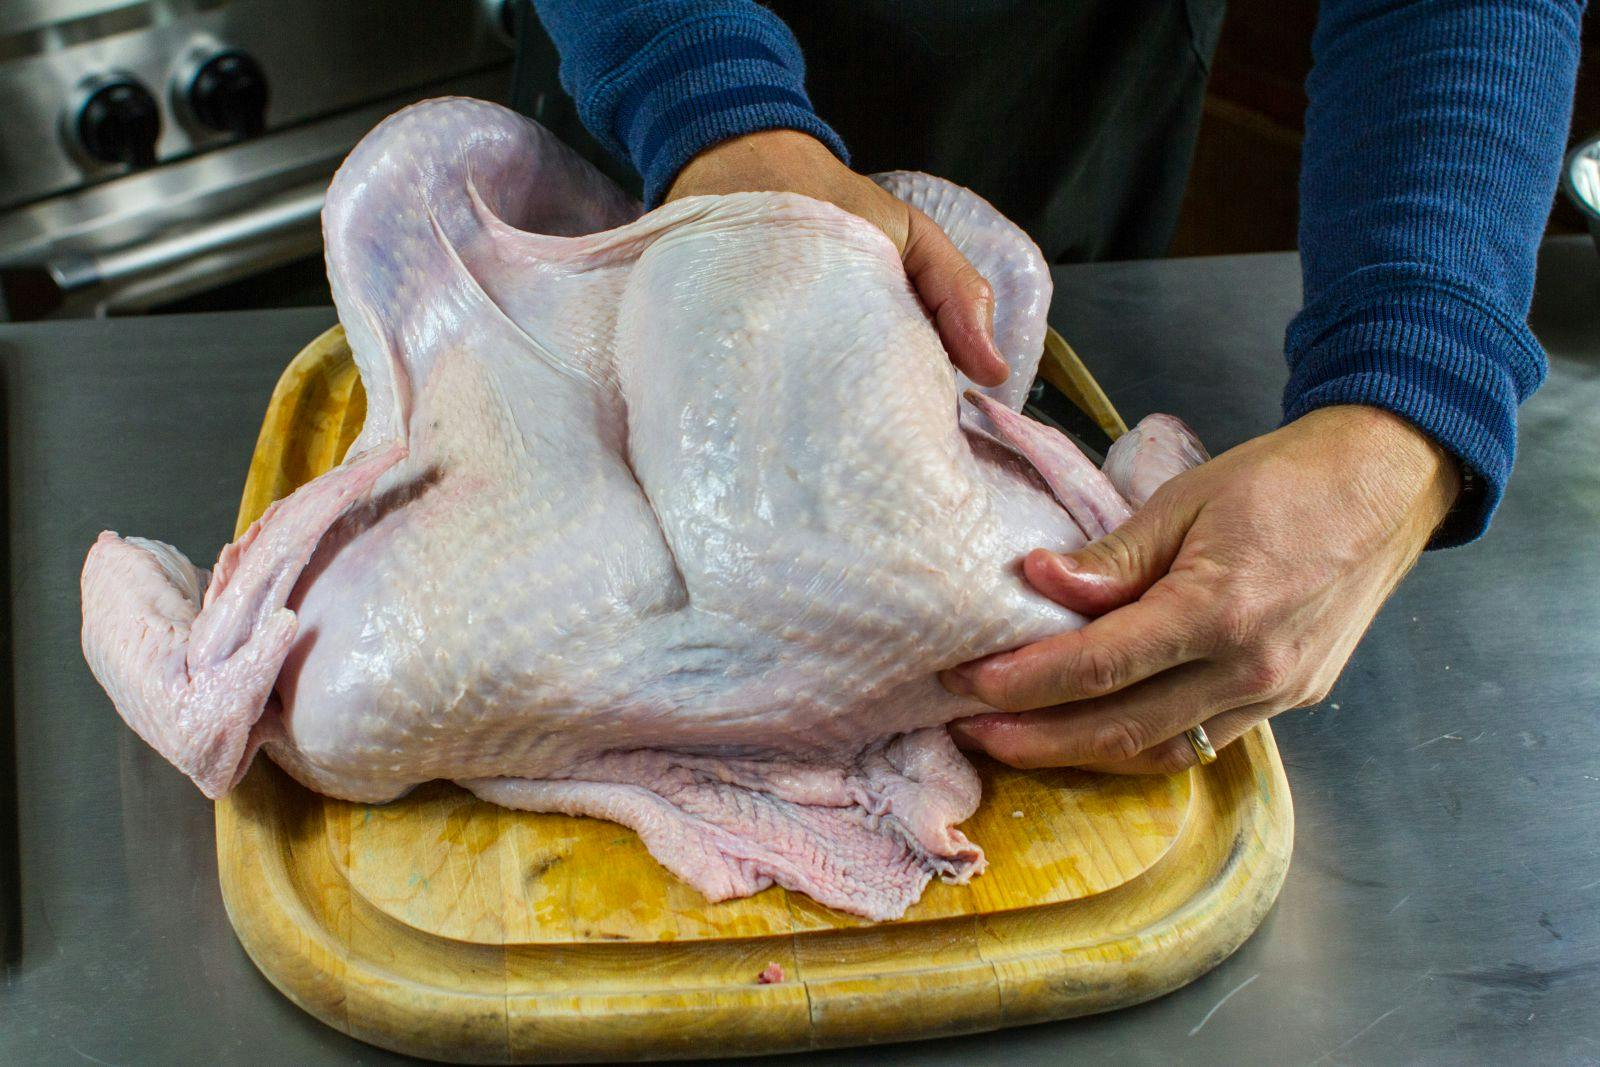
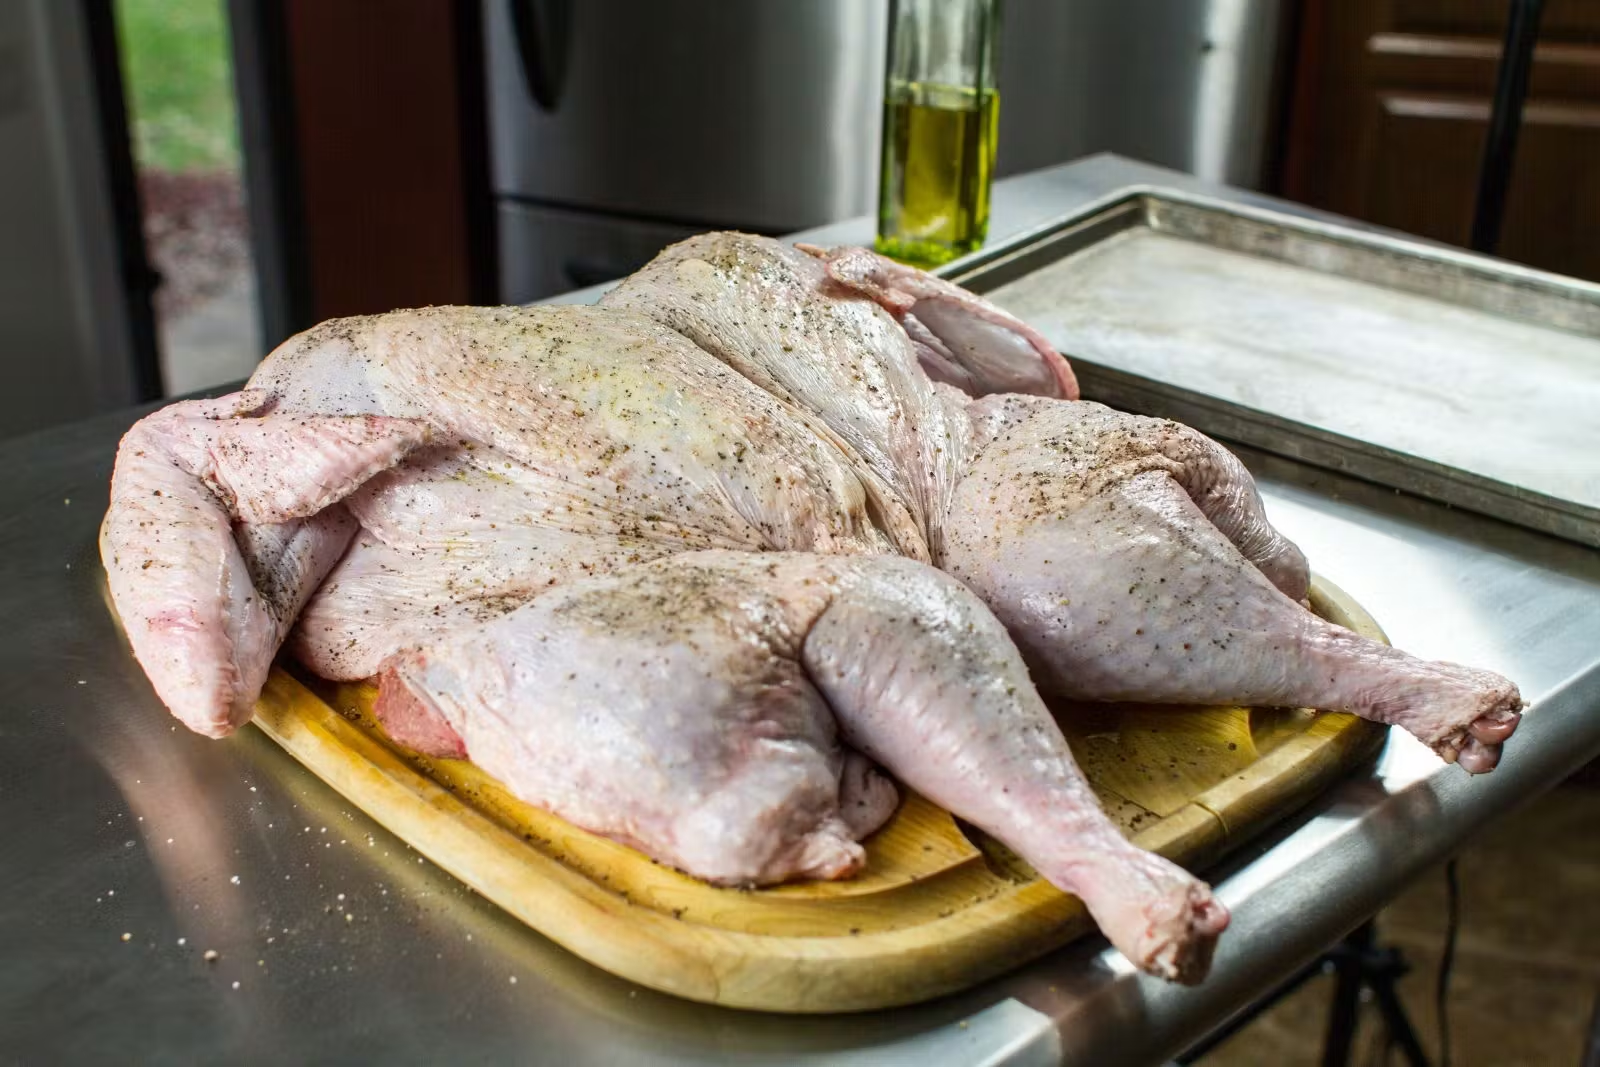
Flip the turkey over so it is skin side up. Place both hands on the breast and push down. You will hear the breast bone and cartilage snap. The turkey should now lie flat.
Tip: For really crisp skin, spatchcock the turkey the day before and allow to rest, uncovered, in the refrigerator 24 hours before grilling.
Prep
While I love well-seasoned turkey skin, I also like the meat to have a little something extra. To ensure this, I separate the skin from the turkey and work seasonings directly into the meat.
With a fork, mix the herbs, butter, and a dash of salt and pepper. Separate the turkey’s skin from the breast meat by working your fingers directly under the skin.
Continue to work from the bottom of the turkey all the way to the neck.
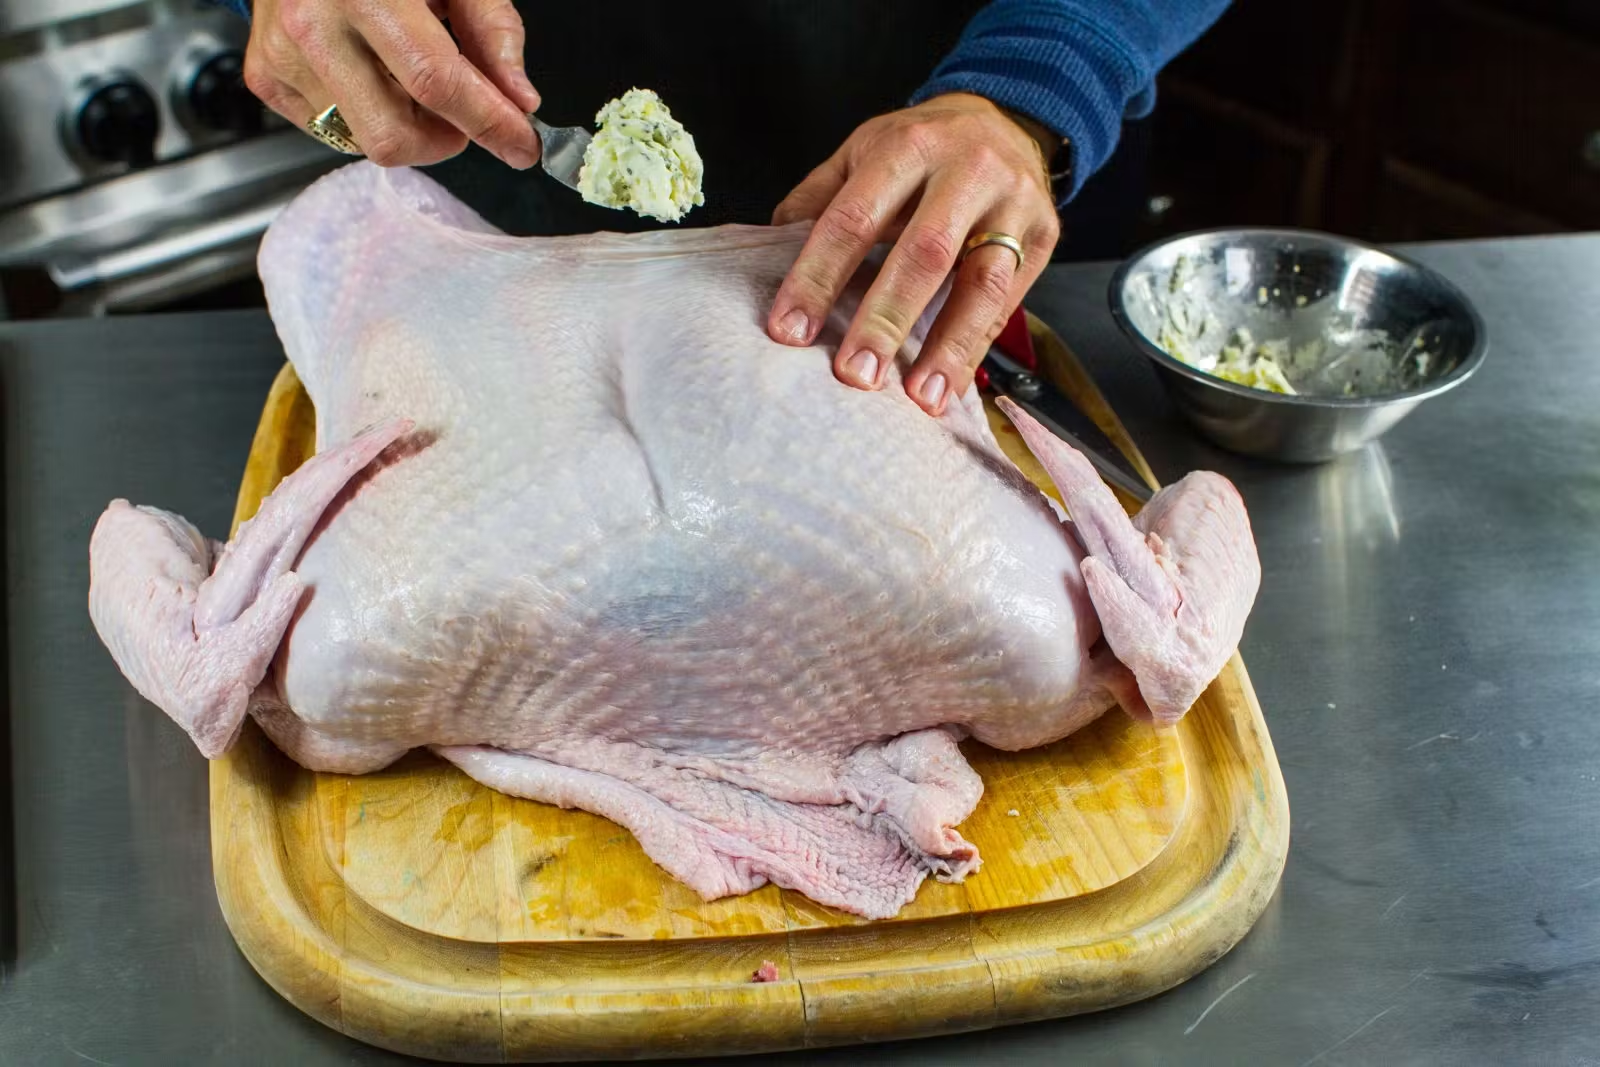
Once separated, add equal parts of the herb butter to both sides of the turkey and massage in.
Generously season both sides of the turkey with salt and pepper.
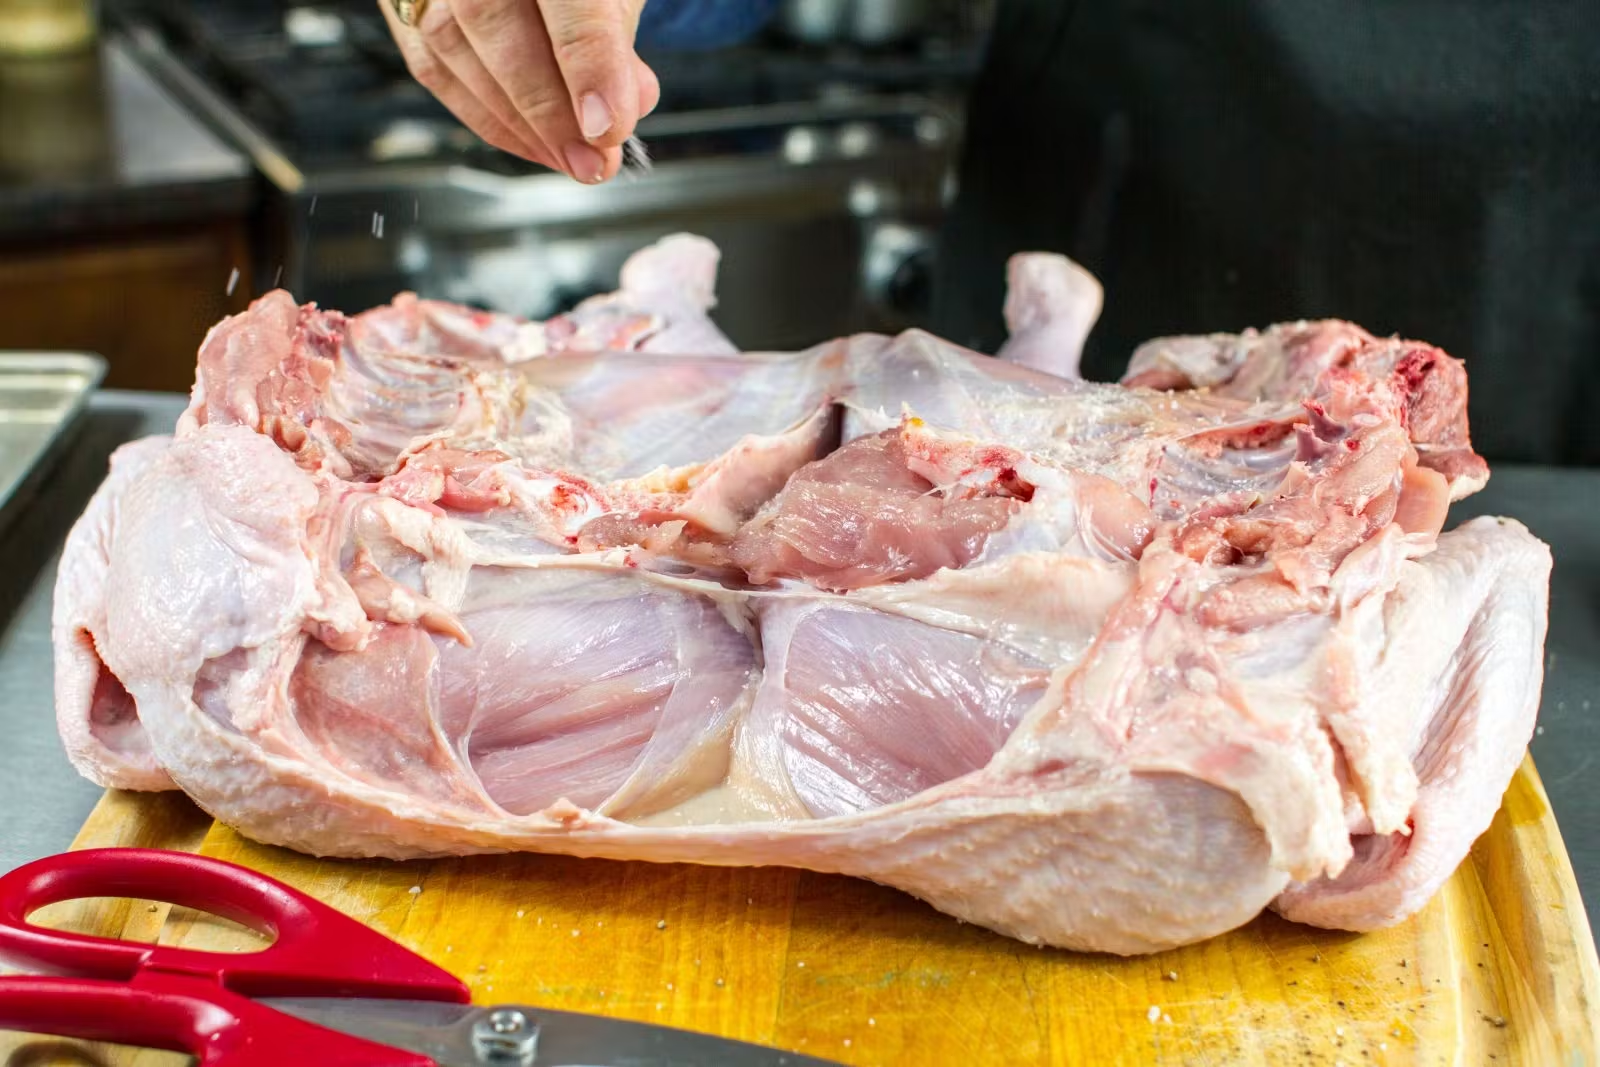
Rub lightly all over with olive oil.
The Grill
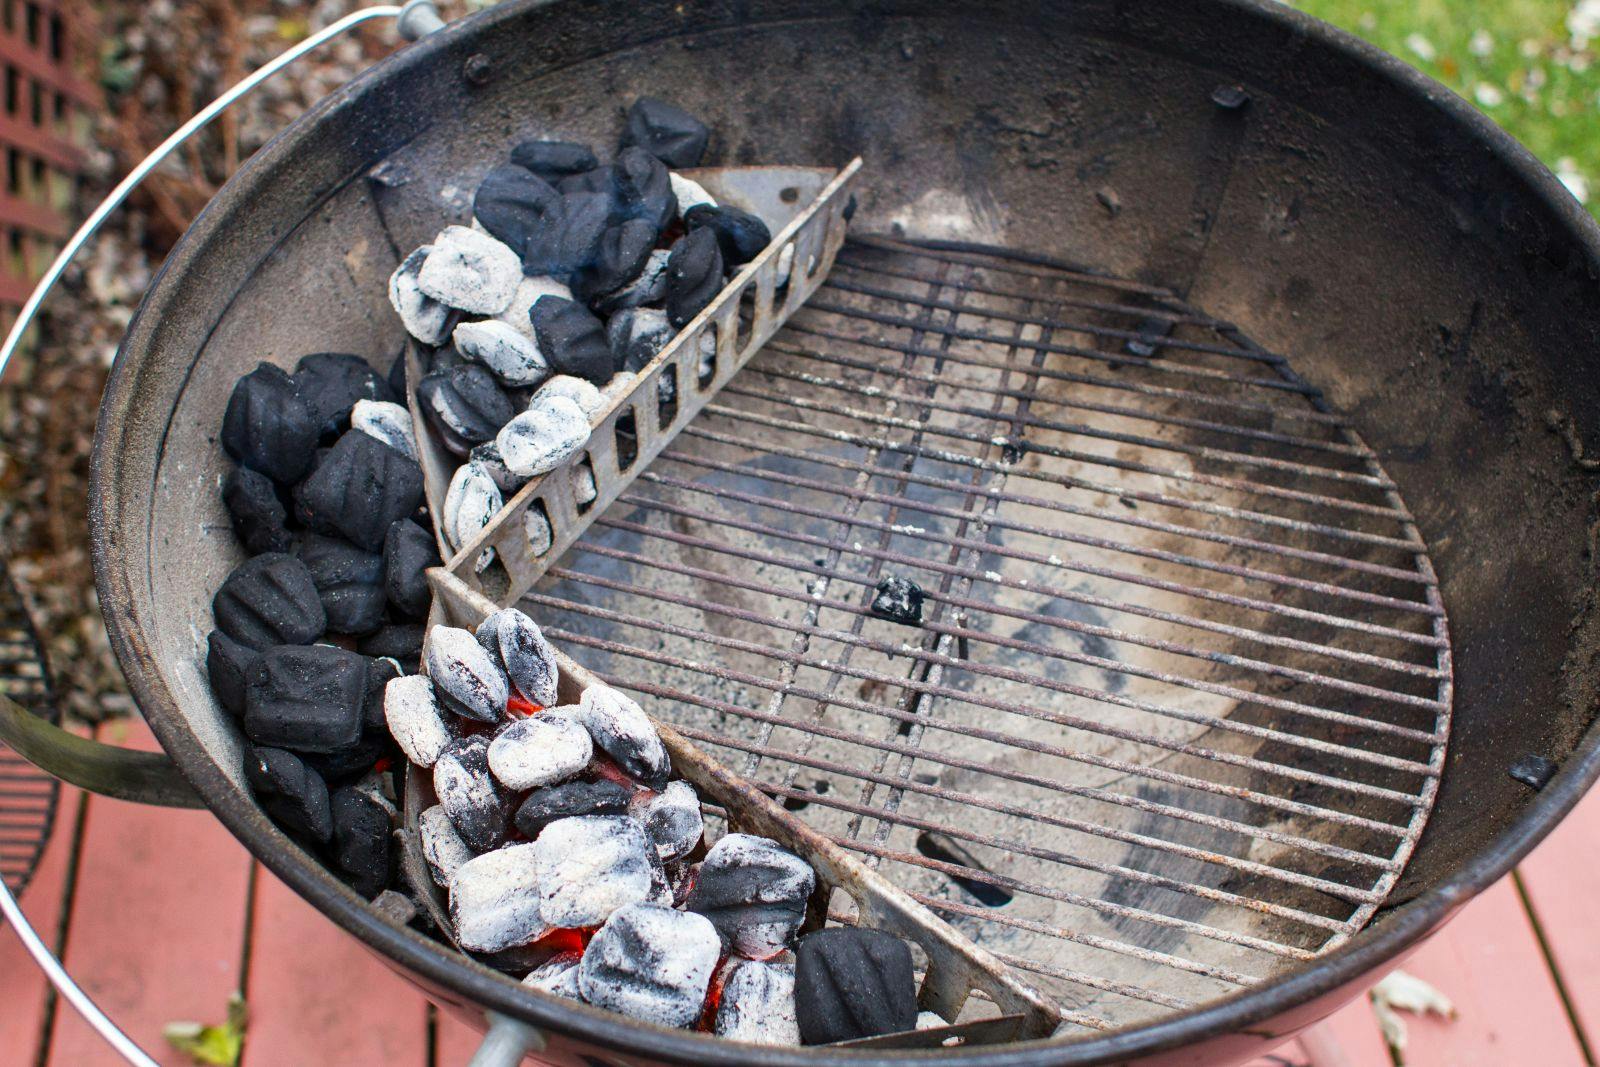
Prepare the grill for indirect medium heat (350 F). Since the turkey is so big, I place all of my Weber Briquettesto one side of the grill in a semi-circle fashion using the Char-Basket Charcoal Fuel Holders.
Tip: I like just a little bit of smoke on my turkey, so I always add one small chunk of apple wood just before closing the lid. It’s just enough to make the turkey more interesting and yet not too overpowering for guests not fond of smoked foods.
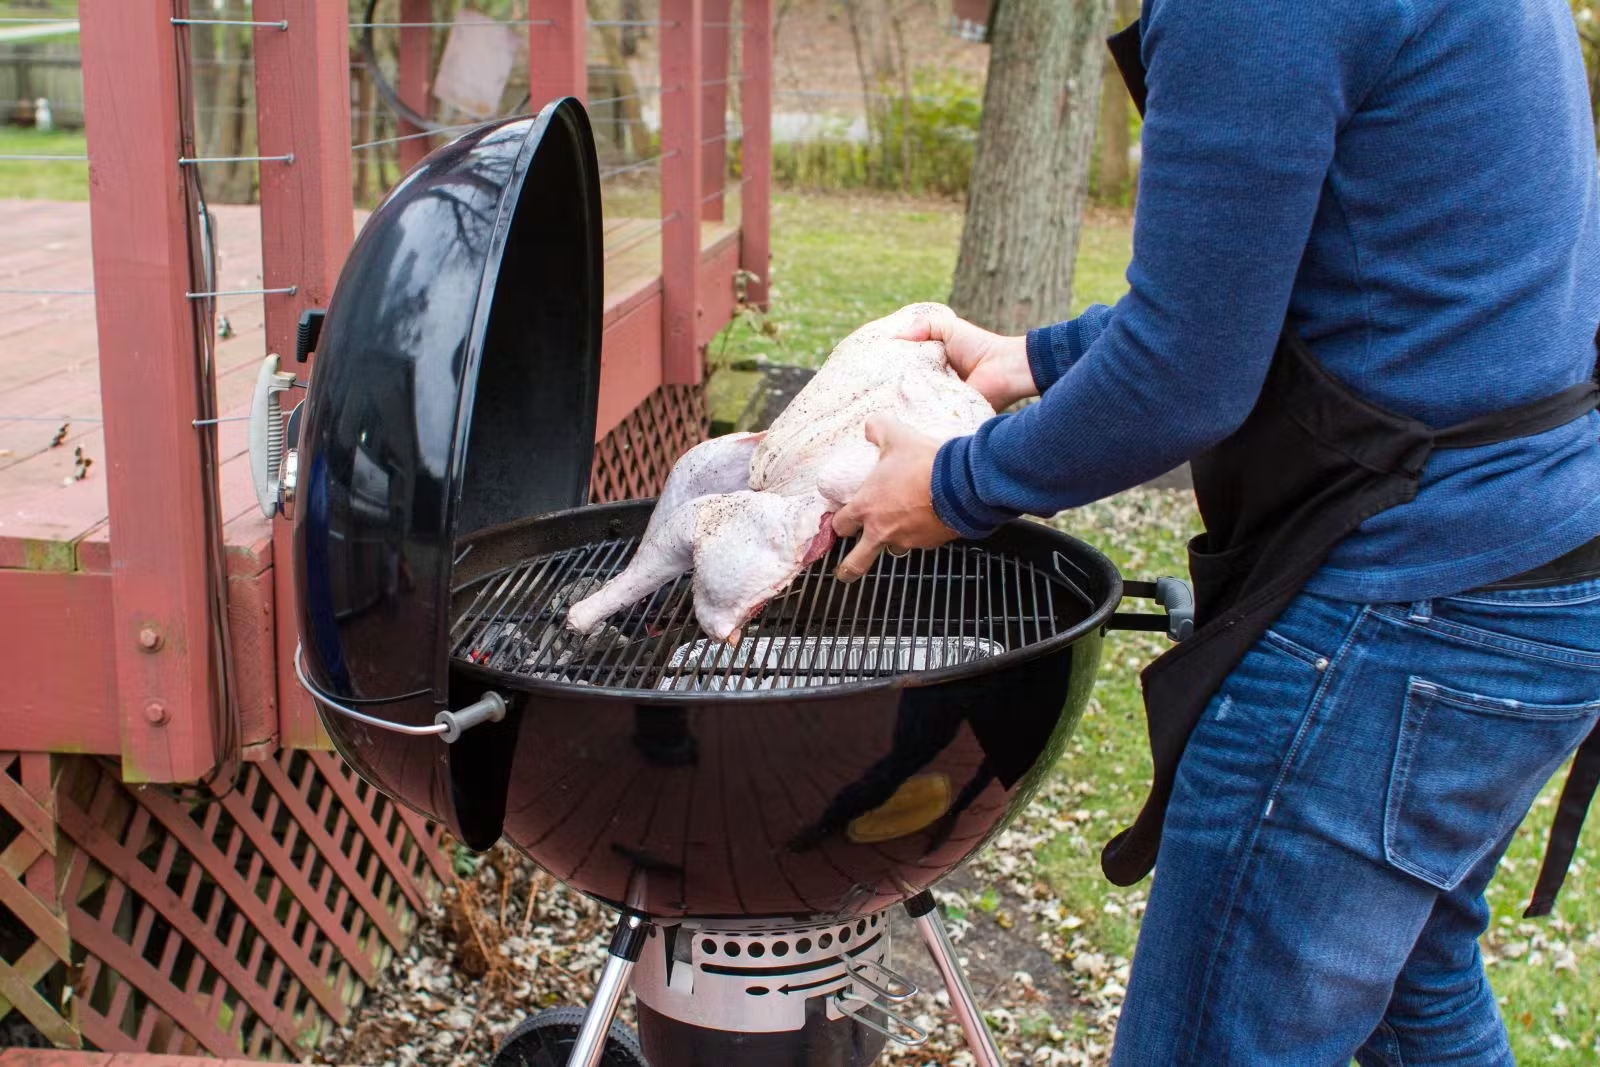
Lower the lid.
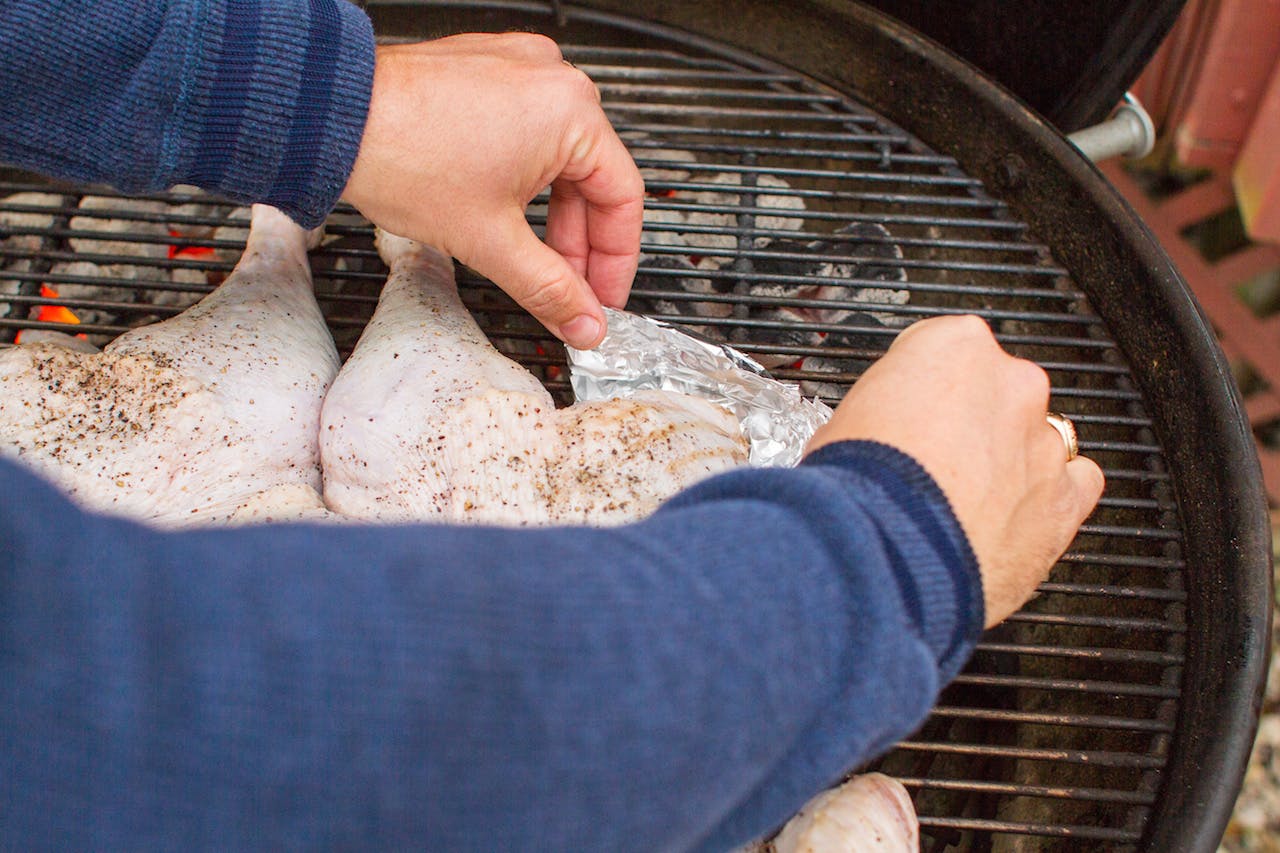
Tip: If your turkey takes up a lot of space on the grill, consider using aluminum foil to shield parts of the bird too close to the coals.
On average, a 12 pound turkey will take approximately 90 minutes to grill. The turkey is done when both the breast and thigh reads 165 F with an instant read thermometer or iGrill bluetooth thermometer.
Remove from the grill, tent with aluminum foil, and allow to rest for 20-30 minutes. Carve and serve.