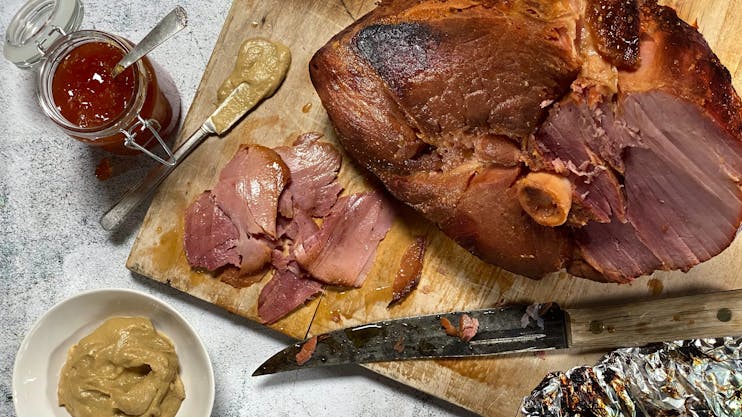
This time of the year, ham is a traditional meal for many. It is also one of my favorite times because I love ham and split pea soup. I really enjoy a slice of moist, tender ham with a sugary crisp crust.
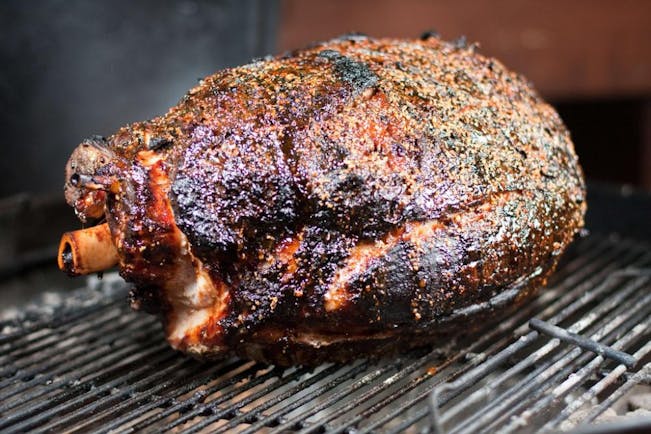
Now, I’ve made my fair share of ham, and can tell you without a doubt that the best way to achieve this is on a grill. The convection cooking your grill provides is unmatched. While the inside of your ham is cooked to perfection, the outside is browned perfectly with your favorite glaze. It doesn’t get any better than that.
The added flavor you get from doing your ham on your grill is only one benefit. There are many other advantages to doing your ham this way.
There is no mess inside the house (and only minimal outside at the grill), the oven is not monopolized with your main dish and can be utilized for other side dishes or desserts, and it’s a perfect way to step outside for a minute and enjoy the approaching spring time weather.
Here is a little advice for those of you who plan on stepping it up for your holiday meal and taking your ham to another level…
Do not change the cooking time on the recipe. Just because you roast your ham on the grill instead of in the oven, there is no need to alter any cooking times. A good rule of thumb is 12-15 minutes per pound when you stay between 225-250 degrees for a precooked ham. Track the temperature with your iGrill.
Make sure you put your glaze on 10-15 minutes before you are going to remove your ham from the grill. This will be just the right amount of time for your glaze to caramelize and brown.
Let your ham rest. This will allow juices to run back into the ham, and hence, make it more moist. Plan on about 30-45 minutes for this step.
The last tips I’m going to leave you with are to enjoy each bite, and save the ham bone for split pea soup!