Buy now, pay later. Rates as low as 0% APR financing with Affirm. Apply Now.
How To Use The Weber Style Wireless Thermometer
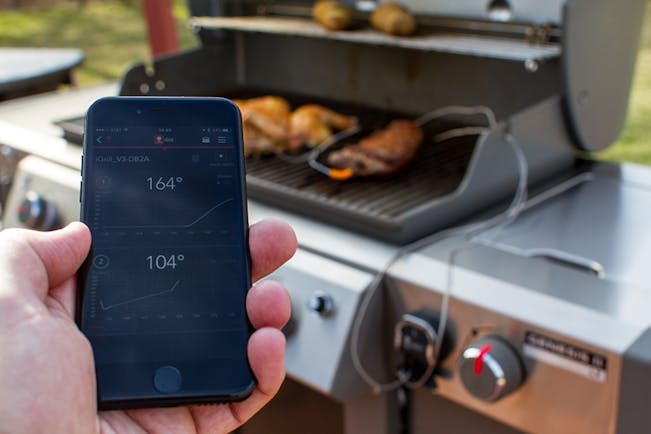
The Weber Style Wireless Thermometer is a great tool for making sure you aren’t over or under cooking your food. It even comes with two probes so you can check the temperature of two entirely different types of foods at the same time!
However, as with any great piece of technology, there’s a learning curve involved. One of the questions we often hear is “How exactly do I use it?” Today we’ll show you how to pair the thermometer.
Initial Set-up Instructions
The following steps will explain the initial pairing setup process. These steps are the first thing you should do after taking the thermometer out of the box. An important note is that the hand-held display must be turned on before the transmitter base. The hand-held display will turn on automatically after the batteries are inserted.
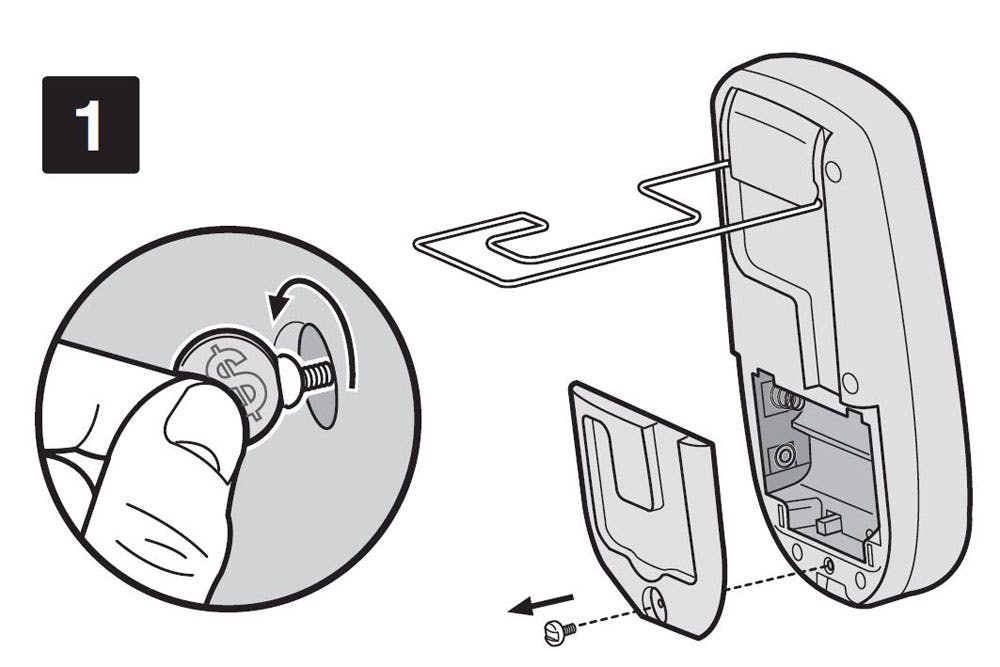
1) Remove the battery cover on the back of the hand-held display with a coin.
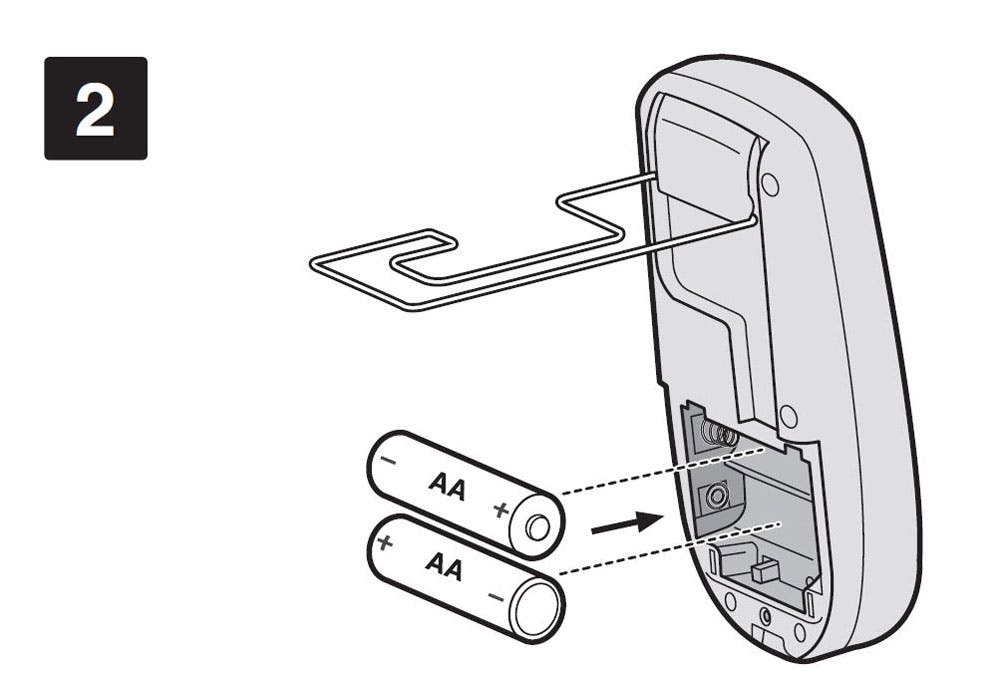
2) Insert 2 AA batteries. Once the batteries are inserted, the hand-held display will turn on.
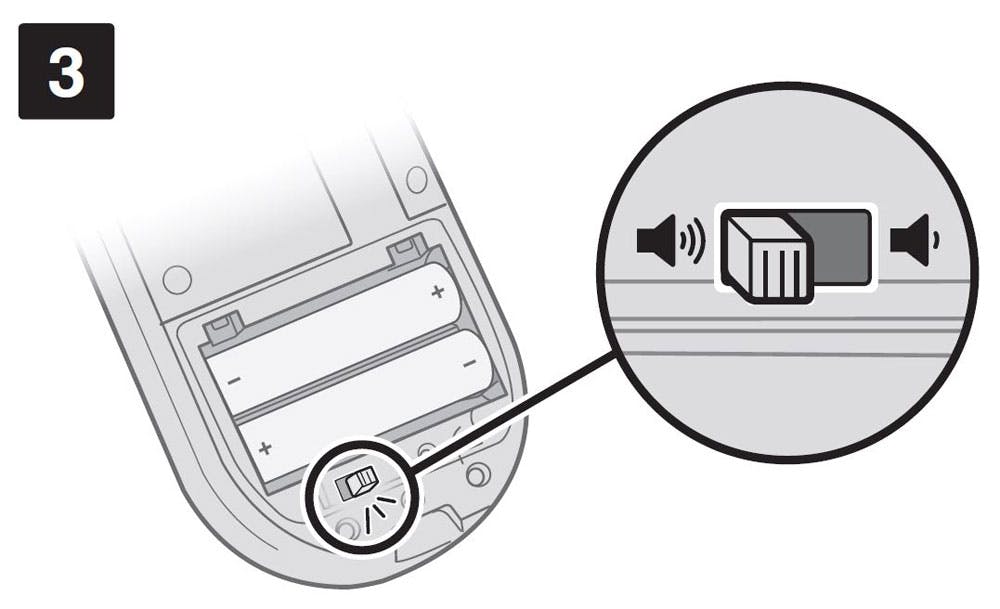 3) The volume control switch on the hand-held display allows the user to control the sound volume.
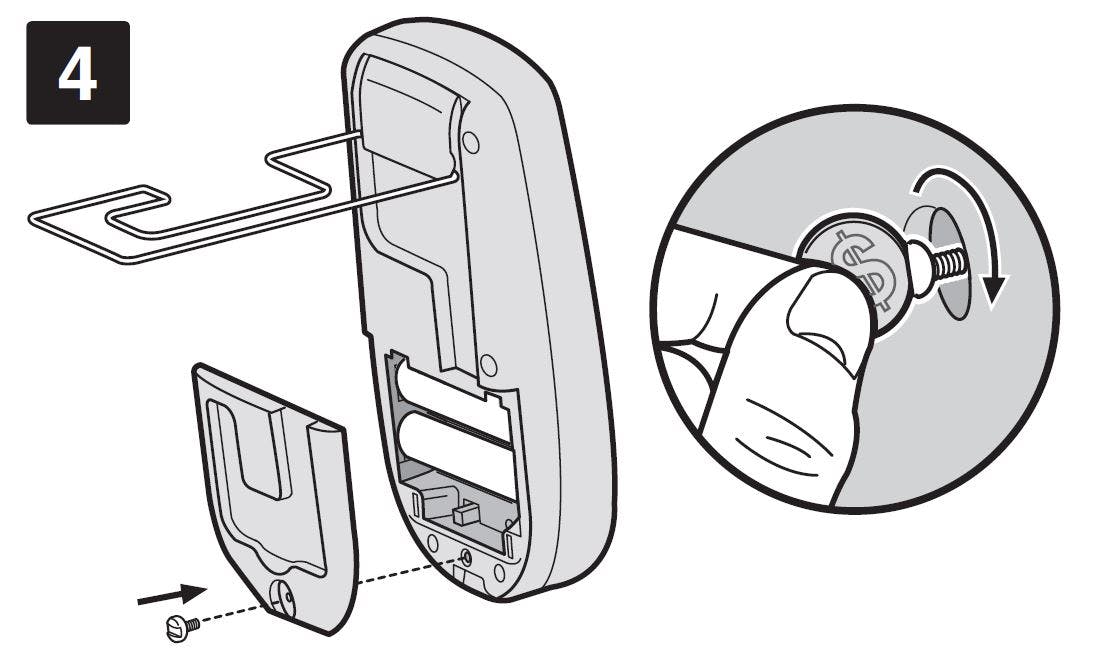 4) Replace the battery cover and tighten the screw with a coin.
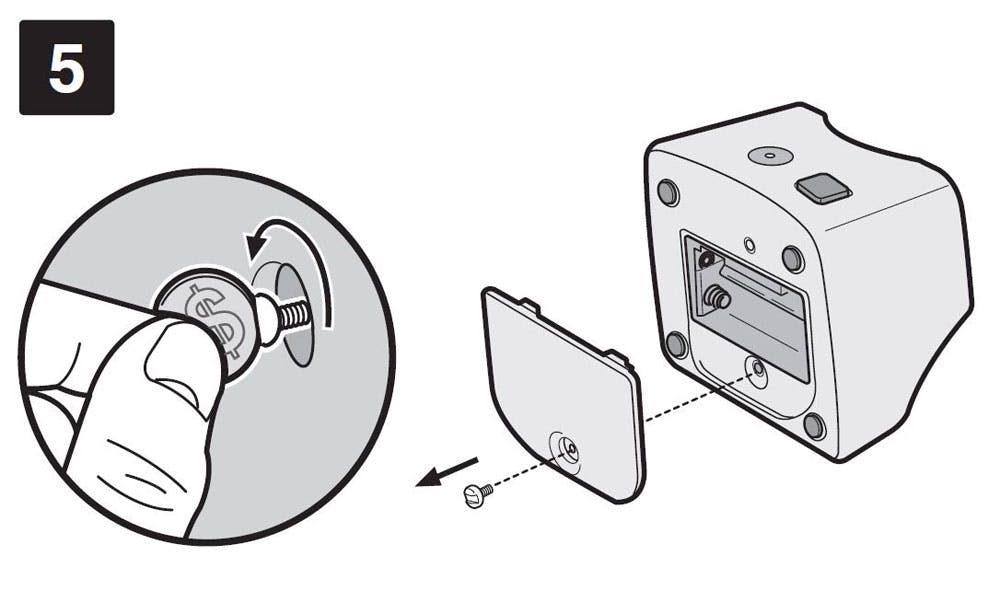 5) Remove the battery cover on the transmitter base with a coin.
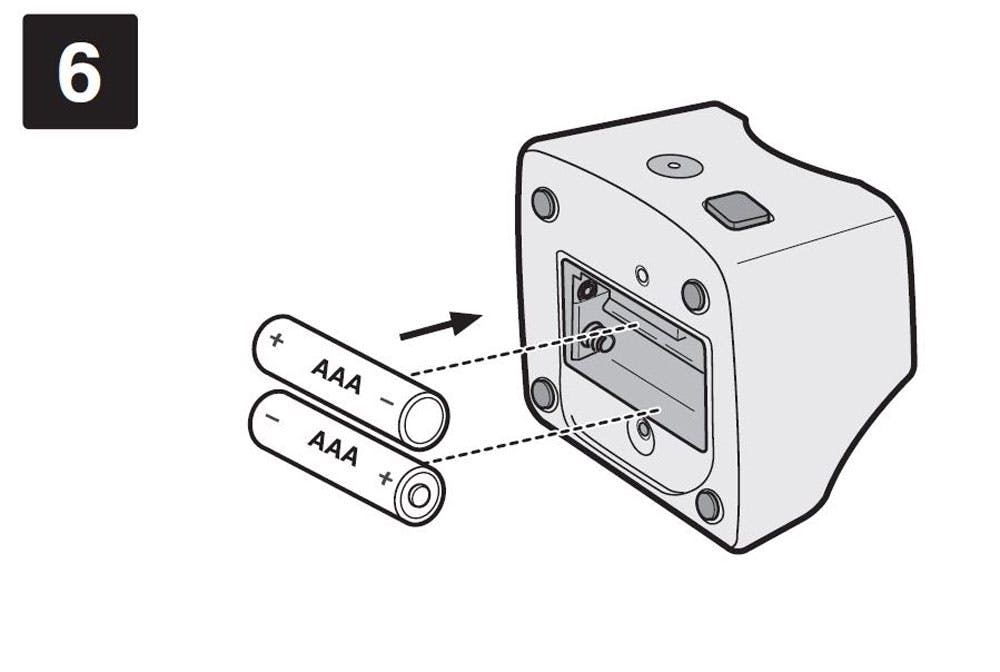 6) Insert 2 AAA batteries. Once the batteries are inserted, the transmitter base will turn on.
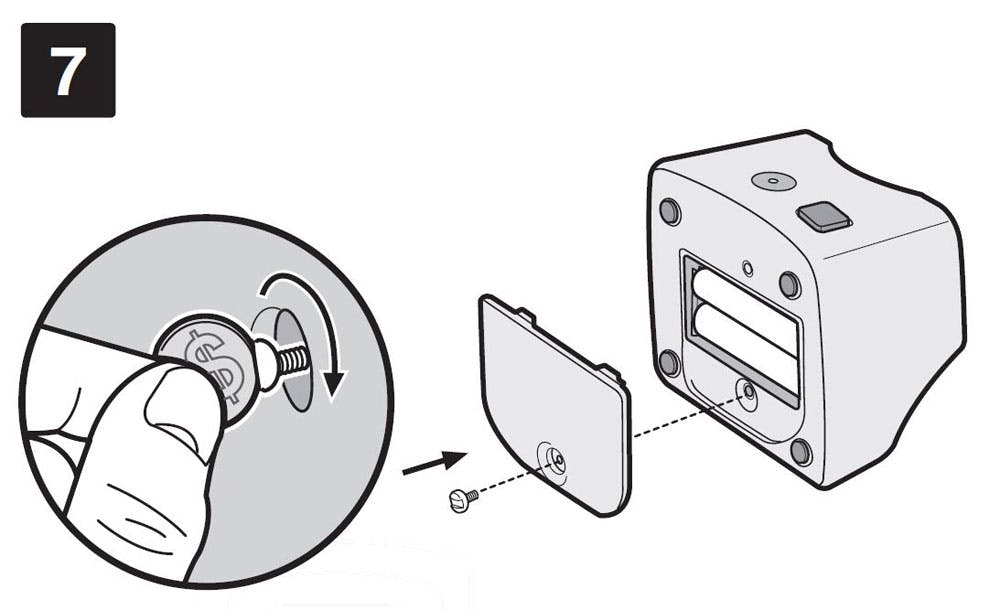 7) Replace the battery cover and tighten the screw with a coin.
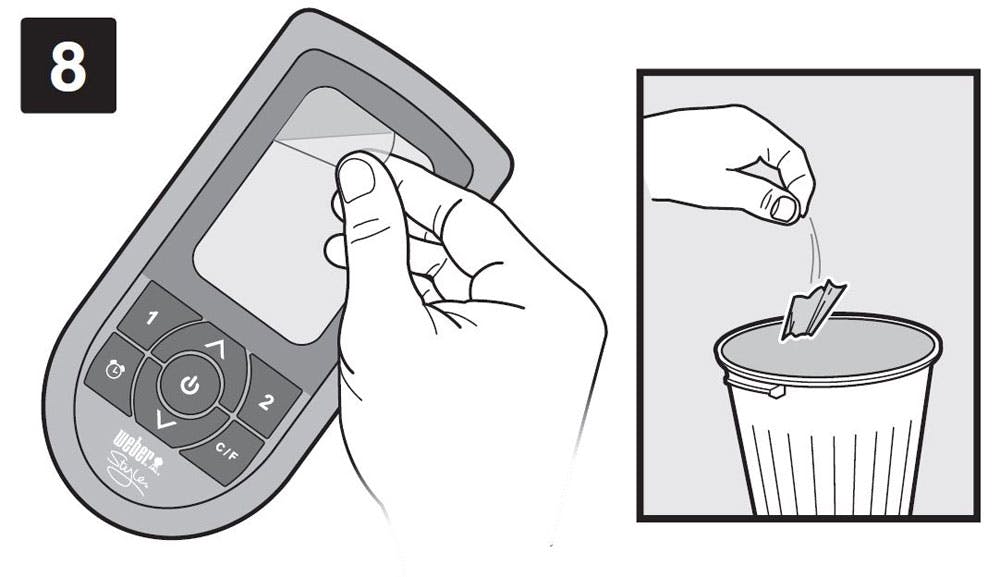 8) Remove the protective film from the hand-held display screen and discard.
 9) DO NOT push the power button during the initial setup. Doing so will turn the hand-held display off.
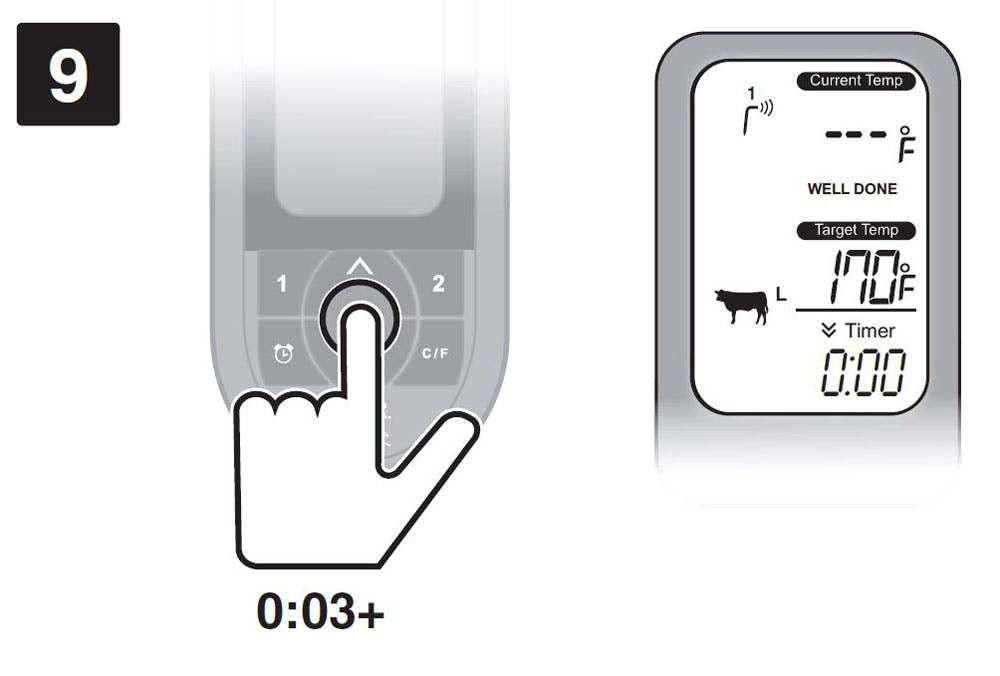
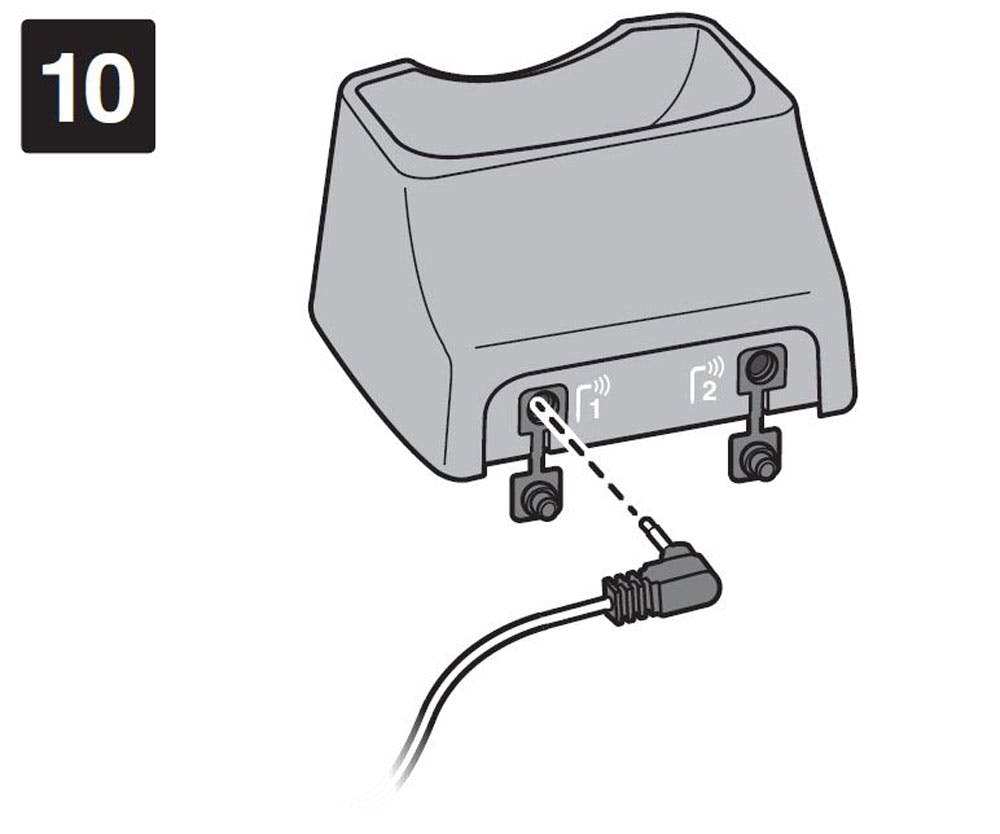 10) Insert one probe into port 1 or port 2. Wait up to 60 seconds for a successful pairing of the hand-held display and transmitter base.
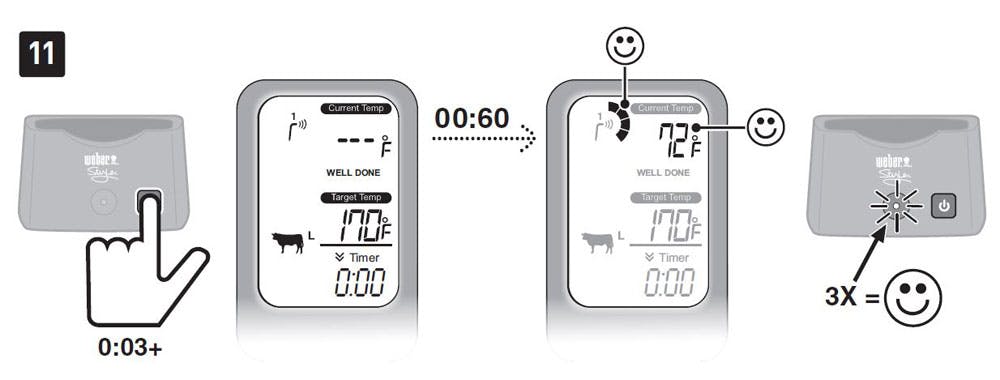 11) The hand-held display will display “---“ with no temperature reading. DO NOT push the power button during the initial setup. Doing so will turn the transmitter base off. Once the Quick-Read Bars appear on the upper left of the screen, and a temperature appears on the right, a successful pairing has been achieved. The transmitter base will continue to blink 3 times, every 12 seconds.
After the initial setup, if the Quick-Read Bars do not appear and the Current Temperature reads “---“ after 60 seconds, the transmitter base and hand-held display must be paired.
PAIRING INSTRUCTIONS
These instructions are what you’d want to use if the initial setup pairing failed, or if you are using the thermometer for the first time after a period of non-use.
Press/Hold “1” and “2” on the hand-held display until you hear a beep and the current temperature readout flashes. Press the power button on the transmitter base for one second within 12 seconds of hearing the beep from the receiver. NOTE: When this button is pressed, you must hear a “click”. Holding the power button for 3 seconds will turn the transmitter base off. The Quick-Read Bars and Current Temperature readout should appear on the hand-held display within 60 seconds, indicating a successful pairing. If the pairing is successful, the transmitter base will blink 7 times and quickly flash 3 times.
If this process does not work, the device will need to be reset. Depending on when the thermometer was made it may or may not have a reset button.
Resetting a thermometer with a Reset button: Remove the battery cover on the hand-held display, using a coin. The reset button is located to the right of the volume control. Push the reset button on the hand-held display, and then push and hold the power button on the transmitter base for one second. The transmitter base will blink 7 times and quickly flash 3 times. Pressing the reset button will also return the hand-held display back to the original factory settings.
Resetting a thermometer without a Reset button: For units without a reset button, hold down button 1 and button 2 at the same time to reset the thermometer.
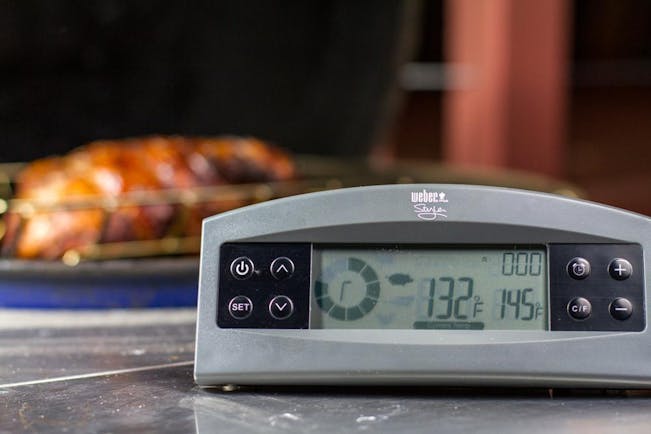
Using the Thermometer
.JPG?auto=compress,format)
.JPG?auto=compress,format)
.JPG?auto=compress,format)
.JPG?auto=compress,format)
.JPG?auto=compress,format)
GENERAL CARE AND USAGE
- After each use, clean the stainless steel probes with hot, soapy water and dry thoroughly. Never immerse the probes in water while cleaning.
- Wipe the transmitter base and hand-held display with a damp cloth
- To prolong the life of the thermometer, always store it indoors between uses.
- This thermometer is recommended for use with barbecues and ovens only
- When using the thermometer with a charcoal kettle or smoker, use care when placing the lid on the wire. Excessive force can crush the wire, making it inoperable.
- Always keep the silicone plugs inserted into the jack openings when the probes are not being used.
- Always keep all components away from contact with the flames. Direct contact with fire will cause damage to the device.
- Always keep lugs and jack openings free from water or other fluids. Exposure to moisture can create poor connections and/or faulty readings.
- Always power on the hand-held display first and then power on the transmitter base. This will reduce the chances of paining difficulties.
- Don’t leave the receiver in the rain.
- Don’t mix old and new batteries, or different brands of batteries.
- The hand-held display and transmitter base can be manually turned off by holding the power button on each for 3 seconds. Wait to disconnect the probes until after the hand-held display and transmitter base have been powered off. The hand-held display will turn off automatically after one hour. The transmitter base does not have an automatic shutoff.
Tips & Techniques
Grill Your Food to Perfection with Weber's New Instant Read Thermometer
by: Jenny Bartels