How To Sear
When I first started here and began to get customers asking about searing, I started doing some of my own research. I found that there are some very common misconceptions among customers about searing in general. Here are a couple of the myths I found to be prevalent that I’d like to see us debunk.
Myth #1: Searing locks in juices.
Myth #1: Searing locks in juices. There is some sort of misconception that somehow the entire surface of a piece of food can be melted into an impenetrable layer that juices cannot escape from, which is completely impossible. Searing actually removes more moisture from food, but this does not detract from the great flavor and texture contrast that searing provides to food.
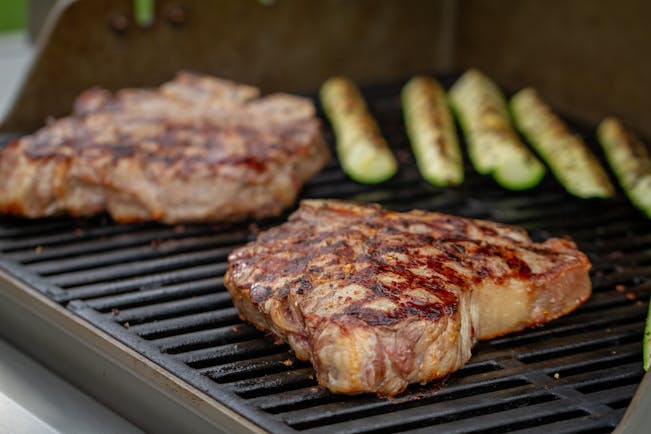
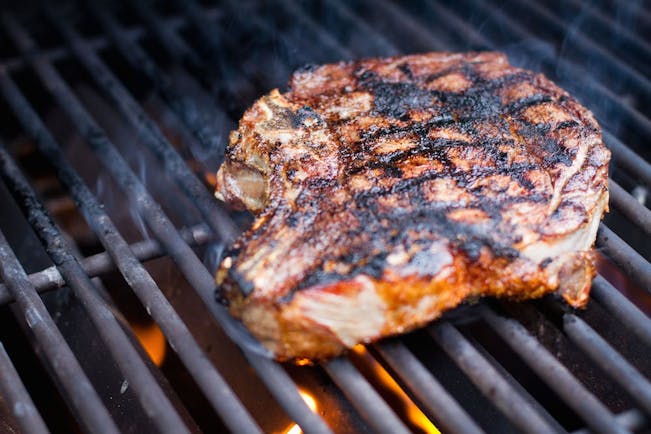
Sear marks are a delicious hallmark of grilled good. Not only does searing food caramelize the outside of the food and whatever seasonings you used, creating a one-of-a-kind flavor, but it also gives grilled food those recognizable markings that make your mouth water. Sear marks look and taste great, but, alas, they do not lock in juices.
It’s true that the heat from the grill will actually push juices out by causing the muscle fibers to contract. Those juices can be saved, however, as long as you grill food for the correct amount of time, and of course, let your food rest for 30% to 40% of the total cooking time before you cut into it.
If you’re a Weber enthusiast, I know you’ve seen this rule before. Letting your food rest allows those muscle fibers to relax again and the juices to run back into the meat, keeping it moist and delicious.
Myth #2: Intensely high heat is needed to sear.
The searing process (also known as the Maillard reaction and carmelization) begins at temperatures as low as 300°F, and the effective searing range is about 300°F to 500°F. Searing at temperatures beyond 500°F can dry out food excessively fast, and usually result in disappointing, burnt food.
Searing can happen while your grill is at any temperature, as long as you’ve followed the number one rule of grilling – Always preheat your grill! No mater what you’re grilling, the first step is always to preheat your grill on high with the lid closed for 10 to 15 minutes. There are two major reasons this step is important for searing.
First, this will burn off old food so you can brush the cooking grates clean. Dirty cooking grates don’t sear new food; they just continue to burn the old food.
Second, while the temperature inside your grill can be anywhere from 300°F to 500°F while you’re searing your steak, the cooking grates themselves must be at least 500°F to 550°F to create sear marks. Preheat your grill to get the cooking grates to the correct temperature and then adjust your grill to the appropriate temperature before you put your food on.
Here are instructions for a great grilled steak:
1. Preheat your grill with all of the burners on high or the dampers open and the lid closed for 10 to 15 minutes.
2. Remove your steaks from the fridge, season them, and allow them to come up to room temperature while your grill is preheating. A room temperature steak will cook faster than a cold one will, and less cooking time means less time to dry out. Additionally, a cold steak will contract more when you put it on the grill, pushing more of the juices out.
3. Brush your cooking grates clean and adjust your grill for direct, high heat. The best temperature for steaks is 450°F to 500°F.
4. Put your steaks on the grill, close the lid, and set your timer for 2 to 3 minutes, depending on the thickness of your steak. (Refer to our grill guide for more accurate times.)
5. Flip your steaks to a new area of the cooking grate. They’ve already absorbed the heat from the area of the cooking grate they were placed on first. Putting them somewhere new ensures that the cooking grate is still hot enough to create those beautiful sear marks.
Close the lid and set your timer for an additional 2 to 3 minutes.**
6. Test your steak for doneness.
7. Once your steak is cooked to your liking, remove it from the grill and let it rest for 30% to 40% of the total time on the grill.
8. Enjoy!
**A thicker steak will require a longer cooking time. If that’s the case, follow steps 1-5 to sear, and then move your steaks to an indirect zone to finish them. This will prevent the outside from burning before the inside is cooked.
Related Posts