Get Grillmaster Grill Marks with the Genesis II Sear Grate
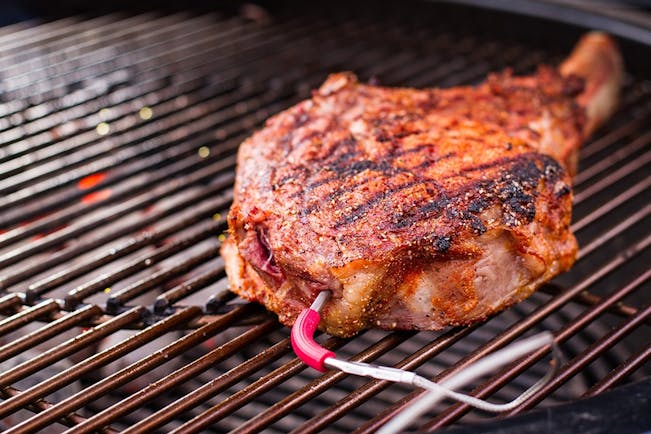
A signature sign of great grilled food is dark, bold sear marks. When we created our line of Genesis II and Genesis II LX models we also designed a special sear grate that makes it easier than ever to put some professional looking sear marks on your food that are sure to impress your guests and your taste buds.
Made of porcelain enameled cast iron, this sear grate retains heat exceptionally well, and the crisscross pattern gives you those diamond shaped sear marks that will have everyone at your next backyard BBQ convinced that you’re a bona fide Grill Master.
They are designed for use with our 3, 4 & 6 burner Genesis II and Genesis II LX models, and depending on which model you own, the grate is setup in one of two ways.
First you’ll need to take out one of the cooking grates on either the left or right side of the grill.

For a 3 or 6 burner model, you’d then place the sear grate into the space left empty by the cooking grate that was removed. You’d want to position the grate with the small “feet” facing upwards.

For a 4 burner model, the sear grate will be placed into the space left empty by the cooking grate, but it will need to be orientated with the “feet” facing down. The sear grate is also going to slightly overlap the cooking grate to the left by a few inches.

It’s also possible to use two sear grates at once, just make sure to leave the middle grate in place for 4 and 6 burner models.

IMPORTANT TIPS
- Before using the sear grate for the first time, hand wash it with a mild dishwashing liquid. Then, thoroughly dry it with a soft cloth or paper towel.
- Make sure to preheat your grill to about 550 F before you place your food onto the sear grate.
- Lightly oil your food before putting it on the sear grate.
- Sear each side of your food for about 1 to 4 minutes, depending on how thick the food is and what it is that you’re grilling. After that, you can move the food to a cooler area of the grill to finish it and achieved your desired doneness.
- After use, wait for the grate to cool completely. Then, soak it in water to remove anything that won’t come off easily and hand wash the grate with warm soapy water. Rinse the grate and hand try it with a soft cloth or paper towel.
- Avoid using anything overly abrasive to clean the grate, such as metallic pads, brushes or harsh abrasive soaps. Also avoid gouging or scraping the grate with sharp metal utensils.